Do you know the difference between Easter Egger chickens and Ameraucana chickens? If you plan to someday breed and sell your own chicks or if you plan to exhibit show poultry, you must be able to distinguish between an Easter Egger and a true Ameraucana. Unsure of the distinctions? Here are three quick A’s to help you differentiate between these two farmyard favorites.
Ana Hotaling
Easter Egger Chickens Ancestry
Unlike the Ameraucana, the Easter Egger chicken is not an actual breed. It is a hybrid chicken, the result of crossing a blue-egg-laying breed with another breed, usually a brown-egg layer. Like the Ameraucana and its close cousin, the Araucana, the Easter Egger possesses the gene for blue eggs. While the Ameraucana and the Araucana always lay sky-blue eggs, however, the Easter Egger lays eggs in an array of pastels, including green, pink and yellow (hence the name “Easter Egger”) thanks to its mixed heritage. Note: One Easter Egger hen will not lay a rainbow of egg colors but rather one color throughout her laying years.
Ana Hotaling
Appearance
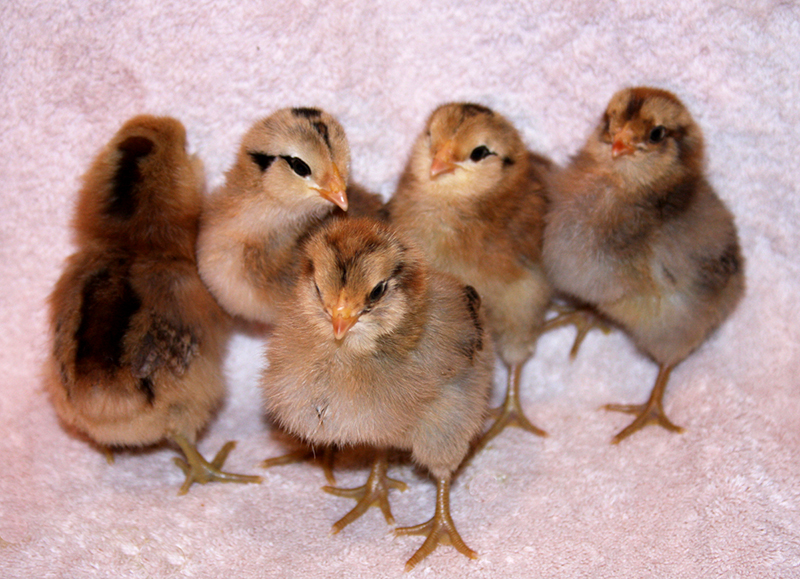
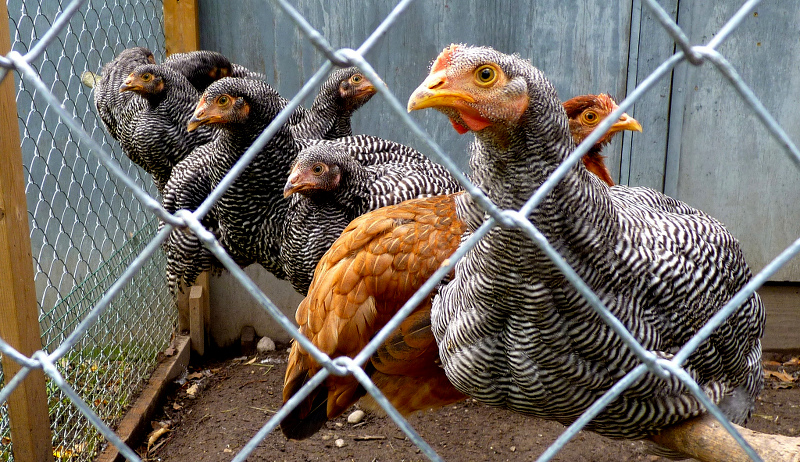
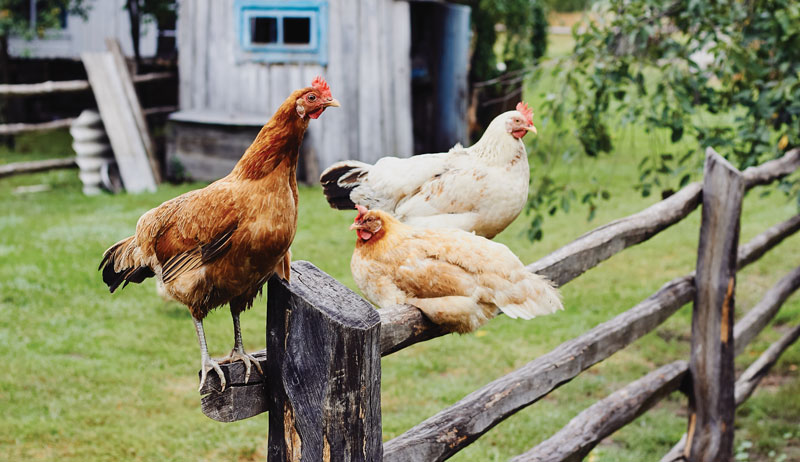
Ameraucanas and Easter Egger chickens sport fluffy muffs and beards, both of which give these chickens their characteristic full-cheeked faces. Both birds have cold-hardy features such as pea combs and miniscule (or absent) wattles, small earlobes, and full hackles and tail feathers. Coloration, however, is where the two diverge. The American Poultry Association recognizes only eight varieties of Ameraucana: black, blue, wheaten, blue wheaten, white, silver, buff and brown red. The Easter Egger has limitless variations, with its mixed lineage coming through strongly in its feather coloration and patterning. Columbian Wyandotte parentage, for example, might yield an Easter Egger with dramatic white and black feathering, while a Buff Orpington pedigree might result in golden Easter Egger chicks. A Rhode Island Red bloodline might bring about a dark auburn bird.
The confusion between Easter Egger chickens and Ameraucanas can be further compounded when the mixed breed features purebred coloration. Not sure whether your chicken is a blue Easter Egger or a blue Ameraucana? Check its shanks. The Standard of Perfection defines the color shank for each recognized Ameraucana variety (for a blue Ameraucana, slate shanks and toes with white bottoms). An Easter Egger’s shanks are most commonly dark olive but can be any color, depending on its lineage.
Ana Hotaling
Easter Egger Chicken Availability
A limited number of commercial hatcheries now offer purebred Ameraucana chicks, usually with a disclaimer that these babies are not meant for exhibition. The vast majority of purebred Ameraucanas are available only through private breeders. If you wish to raise your own flock of true Ameraucanas, consider consulting breeder directories such as those found online at the Ameraucana Breeders Club or the Ameraucana Alliance. Depending on the variety, expect to spend between $10 and $30—or more—per Ameraucana chick.
That price difference is the chief telltale sign that your feed store’s Ameraucanas are actually Easter Egger chickens. These hybrid baby chicks usually sell for $1 to $3 apiece and, unlike Ameraucanas, are practically ubiquitous. You’ll find Easter Egger chicks at feed shops, farm-supply stores, local farms and commercial hatcheries. Unfortunately, many of these places sell their Easter Egger chicks as Ameraucanas—or Americanas, Araucanas and even Acurananas. This mislabeling is typically not done out of malice but out of ignorance. As retail businesses, these shops and hatcheries focus on moving merchandise rather than discovering details regarding their product. The farmers selling “Ameraucana” chicks most likely originally purchased mislabeled chicks from hatcheries, farm-supply stores and feed shops.
Upon seeing the Americana sign on that stock tank, I fleetingly considered finding the shop owners and explaining the difference between Easter Eggers and Ameraucanas. I’ve tried every single spring for the past three years, though, once even providing a comparison chart. In the end, I decided that it’s more important for you to know the difference than it is for them.
This article about Easter Egger chickens was written for Hobby Farms magazine. Click here to subscribe.
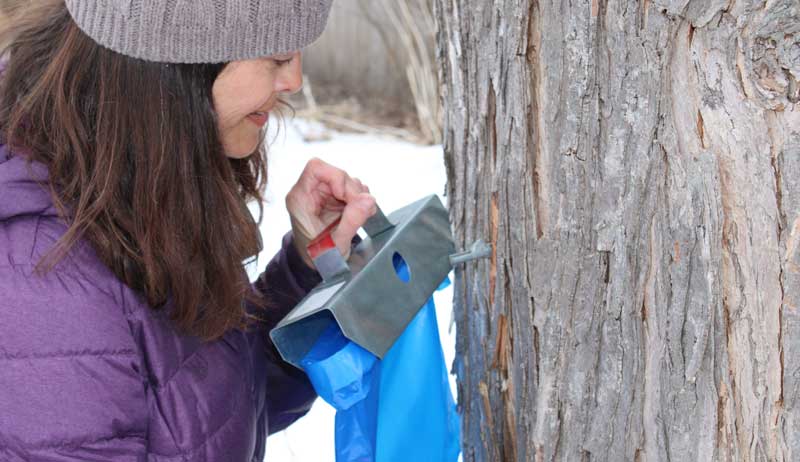
Maple sap can be frozen and melted using an ancient technique based on working with weather and your own maple trees. My family loves tapping our single silver maple tree. Or I should say we love the process of turning that maple sap into delicious maple syrup and enjoying the end results. We’re able to get 6 to 9 pints each season, depending on the weather.
We tap and collect from early to mid-March. We get a big fire roaring to boil the sap into syrup. This boiling process can take a lot of time—too much to accomplish in a night after work—so we tend to take weekends to boil it down. Which means a lot of sap to deal with all at once!
But years ago, we stumbled across a process of freezing and melting the sap before boiling, and it has stuck with us ever since!
Working with Nature
Maple sap flows best when temperatures are below freezing at night and above freezing during the day. A nice sunny day in the upper 30s to 40s with nights in the upper 20s are perfect conditions. This method comes from our local Indigenous people and uses nature’s tendency to freeze at night during the peak of the maple run.
After tapping and collecting sap into buckets, you simply freeze the sap, then let it thaw. You can mimic nature by banking snow around a bucket or by dropping a bucket of sap into a chest freezer overnight.
The sap that thaws and melts first contains most of the sugar. The remaining ice holds very little sugar.
Maple Sap Process
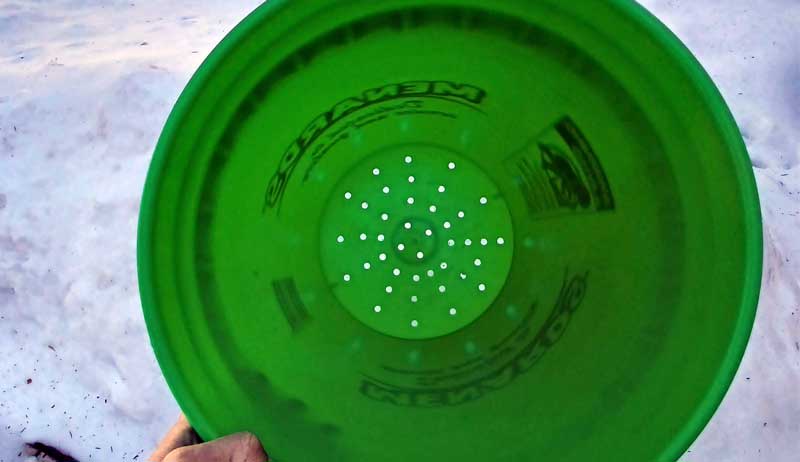
After sap has frozen, we transfer the frozen sap to a “draining bucket,” (another 5-gallon bucket with many holes drilled in the bottom) which fits inside a solid 5-gallon bucket. You can easily raise the draining bucket up on the edges to keep the melted sap separate.
We let it sit at room temperature until the first third has melted and drained through, usually the better part of a day. You can toss the remaining ice chunk. Place the melted and slightly condensed sap back to freeze and repeat the freeze-melt cycle. On the second round of melting keep the first half that melts.
Tip: I use a wine corkscrew to screw into the frozen sap and lift it out of the bucket!
Typical raw sap contains 1 to 3 percent sugar. After two rounds of “freeze and melt,” the sap will contain between 5 to 16 percent sugar. This means a much shorter boil time.
By using the freeze-and-melt method for two consecutive rounds, you retain around 80 percent of the sugar but reduce the volume of liquid to a mere 20 percent of what you started with. Considering the ratio of sap collected to maple syrup made is generally 40 (sap) to 1 (syrup), it is nice to have a jump start on the concentration process.
I love this method because it allows us to collect and hold large amounts of sap, and we can always use a freezer (or the last of snow from shady areas) even as the weather warms. It also helps with those years when the sap flow starts but then stops for longer periods. You can’t let sap sit outside if it is over 40 degrees F for very long. You’ll know your sap has turned if it starts to look cloudy.
Once we have collected the melted sap, we then start the regular boiling process on an open fire. And we still finish the syrup off inside on a stove.
This is a great way to harness the power of nature’s natural cycles and cut down on the overall time (and firewood) needed to boil down sap into sugar.
This article about how to freeze and melt maple sap was written for Hobby Farms magazine. Click here to subscribe.
When to move chicks from the brooder to the coop is something every chicken-keeper should know, especially when you have chicks. It’s a question many ask as the brooder that seemed so immense is now full and the dust is pretty much everywhere. Yes, folks, your babies are just about ready for the coop.
While each breed’s young develops at a different rate, by the time the little ones are fully feathered—usually between six to nine weeks of age—it’s time to transition them to the outdoors.
Be aware, however, that knowing when to move chicks from the brooder to the coop doesn’t simply mean plunking the poor, confused babies into a huge, scary, unfamiliar coop and shutting the door. I personally know three chicken keepers who did this, then consulted with me as to why their once-loving chicks were so fearful, weak and sickly—or dead. To ensure that your young flock thrives in its new home, follow these four steps to transition success.
Provide an Accessible Coop Environment
Shutterstock
A coop for adult chickens is not necessarily equipped to receive younger birds. Perches installed at a height intended for a full-grown flock might be out of the reach of juveniles. The same might be true of hanging feeders and of watering systems featuring nipple drippers.
Before it’s time for you to know when to move chicks from the brooder to the coop, you should set up the coop and make all of these adjustable so that, as your birds grow into their maturity, the perch, feeder and waterer can be raised to heights more appropriate for them. If your coop is elevated, make certain that the ramp you install is at a gentle enough angle to allow the little chickens to reach their pop door.
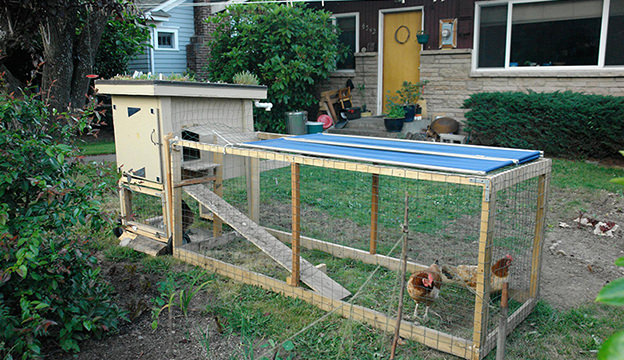
Secure Your Run
Josh Larios/Flickr
If your growing chicks will be contained within a chicken run, inspect the area thoroughly for potential safety issues. Use a hard rake and shovel to even out the ground, remove protruding roots and fill any holes made by burrowing animals. Carefully check the run’s human-access door, installing springs or other safeguards to ensure that it cannot slam shut on a curious little bird. Protect your young ones even further by installing quarter-inch hardware mesh to a minimum height of two feet from the ground along the entirety of the run’s fencing. The ultra-narrow openings in quarter-inch mesh prevent chicks from poking their heads through the fencing, or from being grabbed by something reaching in.
When to Move Chicks from the Brooder to the Coop Depends on Gentle Introductions
Shutterstock
Having spent their entire lives in a cozy brooder, the members of your young flock might stress out when suddenly confronted with so much open space. Ease your birds into their new area slowly, starting with a one-hour test on a sunny afternoon. Bring out their feeder and waterer so they can drink and eat from something familiar. Step away when you sense that your reassuring presence is no longer needed, but stay nearby just in case.
Slowly increase their time in the run until they are happily spending four or five hours outside. At this point, open the coop pop door, allowing the young chickens to discover it on their own. Continue building up the flock’s time in the run and coop, but moving the feeder and waterer to their designated spots inside the coop. You might have to bring a chick or two over and dip their beaks into the water to spread the word that everything’s inside now. Eventually, your little birds will return to the brooder only to sleep, until the day that they all decide to roost on the perch inside their coop.
Tips for When to Move Chicks from the Brooder to the Coop
You’ll be understandably nervous the first time you transport your chicks back to their brooder, only to find them settled in and snoozing inside their coop. Before you securely close the coop doors and run gate for that first night, take a head count to make sure everyone is inside, then leave your little ones on their own. Set your alarm clock for an early hour; your juveniles might be a little disoriented to wake up in a strange location, and your reassuring voice will help calm them as you open their pop door. They’ll peek out with uncertainty at first but, once they recognize their outdoor play area, they’ll eagerly dash out. Be there again as dusk approaches and they start heading in. Once again, your familiar voice as they head into their new quarters will reinforce that this is exactly what is expected of them.
This article about when to move chicks from the brooder to the coop was written for Chickens magazine. Click here to subscribe.
Sticktight fleas are one parasite that you don’t want attached to your flock, so use proper prevention and management techniques.
One spring afternoon, I noticed that one of my bantam hens seemed a little lethargic. Concerned, I made an appointment with my veterinarian and took the hen in for an exam. After determining the hen wasn’t egg bound (suffering from an egg trapped in her oviduct), my vet mentioned she would probably prescribe an antibiotic, thinking the bird may be battling an infection.
The hen was slightly under weight. Her energy, however, seemed normal once she was out of her coop and in a strange environment.
One spring afternoon, I noticed that one of my bantam hens seemed a little lethargic. Concerned, I made an appointment with my veterinarian and took the hen in for an exam.
After determining the hen wasn’t egg bound (suffering from an egg trapped in her oviduct), my vet mentioned she would probably prescribe an antibiotic, thinking the bird may be battling an infection. The hen was slightly under weight. Her energy, though, seemed normal once she was out of her coop and in a strange environment.
“Look at This”
As the vet continued to exam her, looking in her mouth, at her feet and around her face, she suddenly made a discovery. “Look at this,” she said, holding out one of the hen’s tiny wattles.
Deep in the folds, I saw what looked like dark brown splinters covering the inside of the red wattle. The vet scraped some of the brown matter off and put it on a slide, then went out of the room to look at it through the microscope.
As soon as she returned, she gave me the diagnosis.
“Your hen is infested with sticktight fleas,” she said. “They’re attached to her comb and wattles. See?” She lifted the hen’s comb up, showing me dark spots all along the underside.
I had never heard of sticktight fleas before—fleas that attach themselves! I thought fleas jumped around. Wasn’t that what they were known for? Leaping from one part of a cat or dog to the next, and jumping to new hosts after hatching in carpets or grass?
As it turns out, the sticktight flea is a very different creature from the cat and dog flea that most pet owners know. Sticktight fleas are technically fleas, but they almost seem like a cross between a flea and a tick, attaching themselves to their hosts.
Chickens and other poultry rank among their favorite victims.
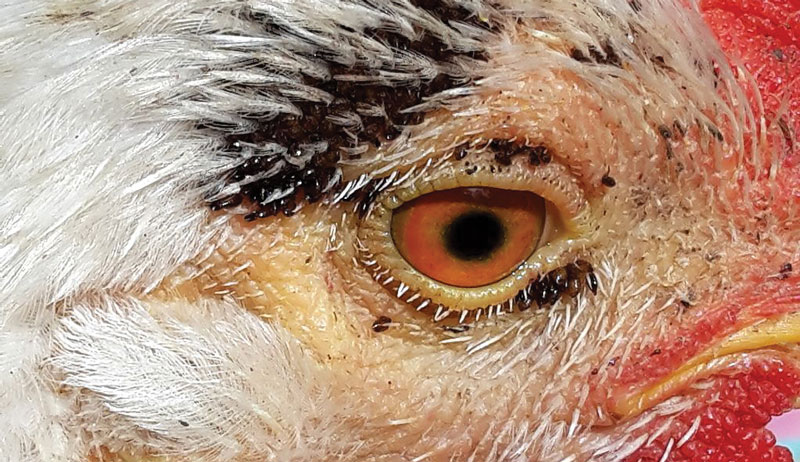
Sticktight fleas surround this chicks face. ChrWeiss/stock.adobe.com
What Are Sticktight Fleas?
I felt guilty I hadn’t spotted these parasites attached to my hen, but turns out I had a good excuse. Sticktight fleas—scientifically known as Echidnophaga gallinacea—are very small, even for a flea.
“Sticktight fleas are smaller than typical dog and cat fleas,” says veterinarian Heidi Watkins, with Wagly Animal Hospital in Rancho Santa Margarita, California. “In fact, they are about half the size of the fleas most people are used to seeing. It requires close inspection of chickens to detect them.”
Sticktight fleas tend to like the soft areas on combs and wattles. They can also attach around the vent area, according to Watkins.
“You have to look in wattle folds and under flaps, as they will often cluster there,” she says. “Sticktight fleas embed their mouth parts into the flesh. You will not see them running around on the skin like a cat or dog flea.”
If you look at a sticktight flea under a microscope, you’ll see that it looks very much like what you would expect in a flea, with one exception. An elongated mouthpart helps it stay in place after it bites and takes blood from a host.
The month-long life cycle of the sticktight flea resembles that of other fleas. Females lay eggs on the host animal (in this case, while attached), which then fall to the ground. Once the eggs hatch on the ground, the larvae live on digested blood left behind by adult fleas, along with whatever organic material is in the environment.
This is why chicken coops are a favorite place for these parasites. The organic bedding we provide for our chickens makes a perfect nursery for flea larvae.
When the larvae are ready, they the form a cocoon made of silk and dust. Then they pupate inside. The adult fleas that emerge from the pupa are ready for a host and can jump 200 times their size to land on unsuspecting animals.
Olesia Bech/Shutterstock
Significant Damage
Some flea species, of course, are famous for spreading disease, such as the bubonic plague. Sticktight fleas aren’t known for this.
That doesn’t mean they can’t do significant damage, though. They irritate birds to the point of driving them crazy with constant scratching and cause enough blood loss to result in anemia. If a bird is already unhealthy, a sticktight flea infestation can put her over the edge.
How to Kill Sticktight Fleas
You don’t want your chickens to endure the suffering of sticktight fleas. Luckily, there are ways to get rid of these parasites if they do show up in your flock.
“There are poultry-labeled products for the treatment of sticktight fleas and mites,” Watkins says. “These are typically made with permethrin, which is synthetically derived, and pyrethrin, which is naturally derived. These topical products are for use directly on the birds and can be also used to treat their immediate environment, like a coop.”
Products made with these active ingredients don’t require a prescription from a veterinarian. Pyrethrin is naturally derived from chrysanthemum flowers and is considered an organic insecticide as long as it is not combined with other synthetic ingredients.
Treat the Whole Coop Area
“It’s important to not only treat the individual birds but also their coop area,” Watkins says. “Remove and destroy contaminated litter, which will contain eggs and larvae. Then spray the permethrin or pyrethrin product all around the coop and nesting areas.”
Because the life cycle from egg to adult is about four weeks in warm temperatures, Watkins advises retreatment of the coop in about a month.
“When using these products, keep in mind that permethrins and pyrethrins are toxic to cats but not dogs,” she says. “Also, make sure to check the product label for egg or meat withholding times after treatment. This is true for any product used to treat and control parasites.”
Erik Streb, OWN WORK, CC BY-SA 3.0
Other Treatment Options
Some chicken keepers also kill sticktight fleas by applying petroleum jelly directly on the bugs by using a cotton swab. This takes advantage of the fact that sticktight fleas are attached to the host. They won’t jump from place to place on the host’s body to avoid being touched.
If putting petroleum jelly right on the fleas is your preferred method, you’ll still need to remove all of the bedding in the coop. This is where unhatched and pupating larvae will wait for their chance to infect your birds.
Some chicken keepers also dust their coops with diatomaceous earth to help kill adult fleas that may be hidden in cracks and crevices near the floor. If you take this route, do the dusting when your birds are out of the coop. And make sure to use food-grade diatomaceous. This is the only type that’s safe to use around animals.
Preventing sticktight fleas from returning to bother your chickens may be a challenge, depending on where the infestation came from to begin with. Sticktight fleas don’t only bother chickens. They also make their homes on rats, mice and squirrels.
In fact, if your birds have sticktight fleas, they likely got them from a rodent.
Most chicken keepers know that rodents love chicken coops. Between the cozy bedding and the grain-based food, chicken coops are a magnet for rats, mice and squirrels. If these critters hang out in your coop and harbor sticktight fleas, it won’t be long before your birds get infested.
“Wild rats, mice, rabbits and even squirrels can be a source of sticktight fleas. So controlling these host pests to begin with can help avoid the introduction of fleas to your flock,” Watkins says.
Repelling Rodents
Of course, keeping rodents out of your coop is easier said than done. Rats and particularly mice have a way of getting into the most secure coop. But you can take steps to make your coop less attractive to flea-bearing pests.
Start by enclosing your coop in wire too small for mice and rats to squeeze through. Chicken wire will do the job most of the time, although make sure it is tightly secured. Rodents will push their way through any section not bolted down in place.
If you find spots in your coop where rats or mice have chewed through the wood (this might happen under the coop, between the ground and the coop floor), fill the holes with steel wool. Then add a hardware cloth to the bottom of your coop.
This will help prevent rodents from creating a new entrance to your chickens’ home.
Rodents are usually attracted to coops because they enjoy the same food you give your chickens. Start by making sure that your bags of chicken feed are stored in metal containers. Metal trash cans work best. Rats can chew through cardboard and plastic, but metal will thwart them.
Be sure the metal container has a tight-fitting lid that a rat or mouse can’t lift.
When you feed your birds, make certain all the food is gone from the coop by nightfall. Rodents roam at night, and they will find a way into your coop if they smell food inside. Consider buying a rat-proof chicken treadle feeder. This will prevent rats and mice from eating your birds’ food at night, and it will hinder squirrels that forage during the day.
Inspect Closely
Rodents are the most likely vectors for sticktight fleas and chickens the most likely hosts. But dogs and cats can also become victims of these unpleasant parasites. If you find sticktight fleas on your chickens, take a close look at your pets, too.
“Dogs and cats can also be affected by stick-tight fleas, but topical products that are labeled for use against fleas in dogs and cats should kill them,” Watkins says. “It’s a good idea to inspect your pets closely, looking for these fleas to have adhered around the ear pinna, eyes and between toes.”
If your chickens don’t mind being handled, check them at least once a month to make sure sticktight fleas haven’t taken hold. If your birds are difficult to catch, examine them in the coop after dark when they are roosting.
Treating an infestation of sticktight fleas can be daunting. But once you’ve removed these pests from your coop, your birds will be happier for it.
6 Ways to Discourage Rodents
Keeping the coop free of mice and other rodents is simply an impossible task. Even if we built our bird’s bunkers surrounded by cement walls, mice would still find a way to get in. The best we can do is to limit our open invitation to them as best as we can.
Here are some steps you can take to do the same.
1. Seal all holes, gnawed or otherwise, with rodentproof materials.
Hardware mesh serves well, but get 1⁄8-inch hardware mesh as mice will fit through the holes of 1⁄4-inch mesh. If you caulk, use a silicone sealant instead of a gnawable latex one. Avoid sealing holes with materials such as rubber, plastic sheathing and green cement, as mice can chew through these.
2. Clean up spilled feed.
Yes, chickens are messy and scatter their feed everywhere. Trying to end that is a losing battle. If a human-caused spill occurs, however, don’t leave the jumble of crumbles for the chickens to eventually clean up. Doing so is the same as stating, “Dinner is served!” to the local mice.
3. Remove all feeders at night.
Mice are mostly nocturnal and avail themselves to your birds’ feeders while the chickens roost and snooze. Store your feeders in a spot rodents can’t access.
4. Collect eggs regularly.
Eggs are an excellent source of food for mice, and eggs left in nest boxes overnight can attract unwanted guests to your henhouse.
5. Keep the area 3 to 5 feet around your coop mowed and free from clutter.
Tall grass, weeds, trash, stacks of wood, abandoned yard tools and other junk make perfect temporary (or permanent) shelters for mice. A neatly mowed yard also allows you to easily check for rodent burrows and pathways.
6. Place mousetraps and rodent-control solutions.
Put these in areas where you see mice droppings. Position toward the walls, as mice tend to run along the walls rather than through an open space. To prevent accidents with inquisitive chickens, set your traps at night and remove them during the day.
If using poisons, use caution around livestock or poultry. Always read the product label, follow all directions and use precautions, as suggested by the EPA.
This article about sticktight fleas was written for Hobby Farms and Chickens magazines. Click here to subscribe.
Growing pansies from seed is easy and fun, plus it’s a great way to exercise your green thumb before planting weather is in full swing. The common garden pansy (Viola x wittrockiana) is a descendant of the viola. Breeders have been “playing” with pansies for generations, selectively breeding them for larger flowers, bolder colors, and improved cold hardiness and heat tolerance. Today’s pansies bear colorful, velvet-like flowers during the cool temperatures of spring and fall.
Pansy Particulars
Pansies are cool-weather flowers that tend to go dormant during hot summer weather. That’s why you only see them on the shelf at the garden center in the very early spring or late in the autumn. Their blousy blooms come in a stunning array of colors, from purple and orange bicolored varieties, to pink, lavender, yellow and even black. As with vegetables, starting pansies from seed will enable you to grow a greater diversity of varieties; certainly more than you’ll ever find at your local nursery.
Because pansies don’t thrive in summer’s heat, to prolong their bloom time, plant them where they’ll receive afternoon shade. This is especially important in southern climates. But, even if they die back when summer arrives, don’t give up on pansies. Simply cut the plants back to the ground and more often than not, they’ll resprout when the cooler weather of fall arrives.
Depending on the variety, pansies can have incredible winter hardiness, with some varieties easily overwintering as far north as USDA zone 5.
Growing Pansies From Seed
Growing pansies from seed is quite easy, though they take a good bit of time to germinate and they’re fairly slow growers. Patient gardeners are rewarded, however, with many weeks of cheery pansy blooms.
When starting pansies from seed, you’ll want to begin the task about 10 to 12 weeks before your last spring frost is expected.
Use new or sterilized seeding flats filled with high-quality seed-starting potting mix to start pansy seeds. You won’t need grow lights until after the seedlings germinate. Pansy seeds require complete darkness to germinate, so after planting the seeds about 1/6″ deep in seeding flats, be sure to cover the seed flats with a black plastic garbage bag to block all light. Place the seed tray on a seedling heat mat to raise the soil temperature a few degrees and improve germination rates and speed.
Even with a heat mat in place, pansy seeds take about two weeks to germinate. Starting pansies from seed is certainly an exercise in patience, but starting at the 10-day mark, begin peeking inside the black plastic bag every day for signs of seedling emergence.
Once you spy a few seedlings poking out of the soil, it’s time to remove the bag and place the flats under grow lights. Run the lights for 18 to 20 hours per day and make sure your pansy seedlings stay well watered, but don’t allow the flats to become waterlogged.
As soon as your pansy seedlings develop their first set of true leaves, it’s time to transplant them into cell packs or small nursery pots. Use a standard potting mix for this. You can also begin to fertilize the seedlings at this time, using an organic liquid fertilizer, such as fish hydroslate or kelp emulsion, diluted to half of the recommended strength. Fertilize every week.
Hardening Off Pansy Transplants
When early spring arrives, it’s time to move your pansies outdoors. But take your time with this process. Like all other aspects of starting pansies from seed, this should not be rushed. To properly harden off pansy transplants, move them outdoors to a sheltered location for a few hours every day, gradually increasing the amount of time they spend outside and the intensity of light they receive over the course of a week or two. Once your seedlings are outdoors full-time, it’s time to transplant them out into the garden.
Growing pansies from seed is fun and fulfilling. These festive little plants make a great addition to beds, borders, containers and window boxes.
This article about growing pansies from seed was written for Hobby Farms magazine. Click here to subscribe.
Choosing the best trees for firewood is an important decision to ponder. (For more on saving time and effort splitting wood, see our Beginning Farmer’s Guide to Log Splitters.) Just as some types of wood aren’t suitable for making some products (it’s not a good idea to make a cutting board, for example, from softwoods such as pine or fir), some types of wood aren’t suitable for use as firewood. However, with so many different types of wood, learning which trees make good firewood can be a time-consuming and labor-intensive process. To help you avoid this, here are some tips to help with your firewood selection. (And to help you avoid the risk of chimney fires, read how to manage and minimize creosote buildup in your chimney.)
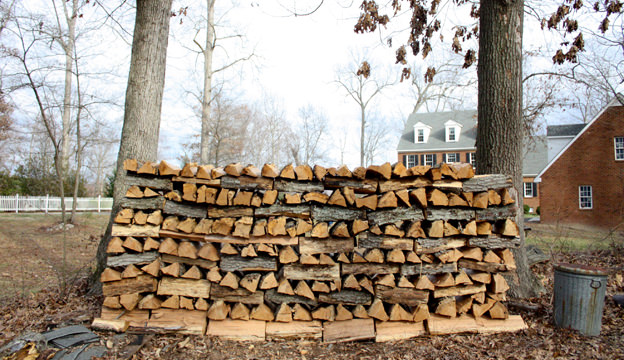
The Best Firewood
I’ll preface this by saying that wood from many trees can make quality firewood, and highlighting only the very best excludes some very usable trees. Also, what constitutes the “best” firewood varies depending on its planned use. If you use firewood as the primary heat source for your house, you’ll want a high-quality wood that produces a lot of heat. If, on the other hand, your main interest is creating a fire to add ambiance and atmosphere to a winter evening, you might be fine with a lower-quality wood. With that established, here are a handful of trees that stand above all others when it comes to producing quality firewood.
Oak for Firewood
The best-known firewoods are white and red oak trees. The wood from these oak trees is prized for its strength and density, and that density makes it one of the best at producing heat.
Hickory
The wood from the hickory family of trees, which includes pecan trees, is also very dense and prized for use as firewood, being of similar quality to oak.
Black Locust
One lesser-known tree that makes great firewood is black locust. The species has a fairly limited range, growing in just a handful of states through the Appalachian Mountains and into Missouri and Arkansas, but it produces a strong, dense wood famous for making fence posts. Not surprisingly, the same density and durability that makes black locust good for fence posts also makes it among the best firewood trees.
Other Good Wood to Burn
White ash, sugar maple and birch trees also produce excellent firewood, albeit not quite as good as oak and hickory. But all three have their advantages:
Sugar maple has a good reputation for burning with few sparks and less smoke than what’s produced by other woods.
White ash weighs less than most other types of quality firewood and is easier to split into burnable logs.
The bark of many mature birch trees is quite flammable, making it good for easily starting fires.
Horia Varlan/Flickr
The Worst Trees for Firewood
Coniferous Trees in General
As a general rule, most coniferous or “softwood” trees—the types of trees that have needles rather than leaves—are not well-suited for use as firewood. As their “softwood” nickname implies, coniferous trees usually have softer, less dense wood than deciduous trees, which have leaves, meaning softwoods provide less fuel for the fire and usually produce less heat. You can certainly burn it, but the wood from coniferous trees also contains pitch and is notorious for creating creosote buildup when it burns. Creosote can stick to the walls of your chimney and become a fire hazard. These woods also tend to produce more sparks and smoke, which can spoil the mood that you want to generate by starting a nice, cozy wood fire.
Hemlocks in Particular
One coniferous tree you probably don’t want to burn at all is hemlock, as it’s roughly akin to burning a rock. The wood of hemlock trees (not to be confused with the poisonous plant of the same name) features extremely hard knots that make the trees difficult to split into burnable logs. Even if you get hemlock wood to the point where it can be burned, it produces sparks sure to discourage you from ever burning that type of wood again.
Deciduous Trees
Some deciduous trees also don’t make good firewood. Aspen, basswood and willow trees all have very soft wood of generally poor quality for burning and producing heat. That said, this wood is a little better than that of most coniferous trees because it doesn’t spark as much.
As you can see, there’s plenty to consider when evaluating the best and worst types of firewood. (Once you’ve found trees you want to use, learn how to cut and store the wood.) Which trees you choose depends at least in part on their availability in your area, but if you secure a winter stockpile of oak, hickory, maple, ash or black locust firewood, you’ll be rewarded with many warm, smoke- and spark-free fires on cold winter evenings.
This article about the best trees for firewood was written for Hobby Farms magazine. Click here to subscribe.
The life span of a duck varies by the breed. Ducks are not as long-lived as geese. The average life span of a domestic duck is 10 years or less. As a general rule, the largest breeds of duck have the shortest life span. Seldom do they live beyond five to seven years of age.
Muscovy
An exception is the Muscovy.This duck might reach a life span of between eight and 12 years of age, or more.
Pekin
The Pekin (probably due to its rapid growth rate as a young bird) normally has a relatively short life span, perhaps five years. The first part of a Pekin to fail as it ages is often its legs. I suspect that rapid weight gain in its first year taxes its ability to support itself.
The actual useful life span such as an exhibition Pekin might be only three years. “Useful life” is determined by the length of time it’s useful as a breeder.
Life Span of Ducks Considered Medium to Light
The average life span considered a medium or light duck (Cayugas, Blue Swedish, Runners) might exceed that of largest duck by two or three years.
Keep in mind, however, that ducks kept for egg production might only produce an optimal number of eggs per year for two or three years. In fact, pushing female ducks to produce large numbers of eggs will probably shorten the life span of a duck of a member of any breed.
The longest life span by a considerable margin is one of the bantam ducks—the Calls and Black East Indies in particular.
A number of mine have lived a decade or more and one Grey Call female lived 15 years. They also tend to have longer useful lives from a breeder’s standpoint, with males remaining fertile for as long as a decade and some females able to produce eggs for an even longer period, assuming the best of care. Because they carry less weight and don’t experience ultra-fast growth rates, their bodies tend to hold up longer.
Of course, a discussion of the life span in any breed assumes that the birds are provided with a good diet and appropriate housing and are not overcrowded. —Lou Horton
This article about the life span of a duck was written for Hobby Farms magazine. Click here to subscribe.
Stocker cattle can be a great way to make money on your hobby farm, if you know how to get started correctly.
Jason Detzel’s Diamond Hills Farm in Hudson, New York, started as a cow/calf operation. When the social-worker-turned-farmer accepted a full-time position with the Ulster County Cooperative Extension office, he didn’t have the time for harvesting crops and maintaining equipment.
But he didn’t want to give up cattle all together. Instead, he transitioned his business into a stocker operation. He now runs between 50 and 75 black Angus on his 130 acres.
What are Stocker Cattle?
The University of Kentucky describes a stocker calf as a steer or heifer that is 6 to 9 months of age and weighs 400 to 700 pounds. After weaning from its mother, a stocker is put on grass or some other type of forage to promote growth and weight gain.
“This is a great definition. And there are some hints in this definition that help define the practice of raising stockers,” Detzel says. “These cattle, both steers and heifers, are grazing to grow. These are ‘teenage’ cattle. It’s important for them to have the most nutritious and stress-free lifestyle so they can grow healthy and put on pounds.”
Stocker operations look for “bargain” cattle, put weight on them and then sell them to a feedlot for finishing, according to Dale Blasi, a professor/extension specialist at the Kansas State University Beef Stocker Unit.
The school’s 1,120 acres of native warm season grass is divided into 20 paddocks. The facility can accommodate more than 400 head of 500-pound calves at any one time. These animals are used for research studies on production-related topics.
The stocker cattle market is an opportunistic one. Typically, stocker buyers “buy ’em ugly and sell ’em pretty” by finding cattle that are have recently been weaned or are coming out of their first winter. These animals likely look a little rough and need TLC. However, that doesn’t necessarily mean it’s the most advantageous to buy the cheapest animals. After Detzel’s first year in the stocker business, he lost $1,000.
“I went against all the recommendations when I bought my first round of stockers,” he says. “I bought the worst-looking cattle at auction. They had pneumonia and pink eye. I’m running pasture animals and didn’t have the indoor facility to rehab them.”
With preparation and knowledge about what to look for in bargain cattle, getting into the stocker business can be lucrative.
Beginning With Bargains
Finding bargain cattle is the key to success with the stocker market, but it needs to be strategic. Sickly animals or uncastrated bulls require more attention and the right facilities to be brought back to health.
“They should be properly weaned,” Blasi says. “If calves are bawling or commingled from numerous sources together, it means they were just separated from their mother and thrust into a challenging environment. Things can fall apart quickly for these calves.”
JNix/Shutterstock
Blasi compares this environment to a kindergarten classroom, where one kid comes to school with a runny nose, wipes it with their hand or sleeve and spreads to their classmates. Buying vaccinated cattle decreases the chances for common diseases such as pink eye and bovine respiratory disease, which is similar to pneumonia in humans. Knowing the seller seems to improve a buyer’s chances for acquiring healthier cattle.
“Many feeders will background calves into a stocker program,” Blasi says. “They may offer this service to clientele they know specialize in stockers, and it can make a good partnership.”
Know Your Seller
Detzel has found that establishing a relationship with a cow/calf operation has increased his chances for success.
He paid more for preconditioned cattle who were vaccinated. His contract with the seller included treatment of any sick after they arrived on his property.
The investment paid off. He only treated two cattle in 2019. Overall, the herd averaged a higher daily weight gain than the previous year.
Buying better quality stock also means being prepared to reject a delivery of cattle or walking away at an auction.
“It can be difficult to source the cattle you want, but that doesn’t mean that you are locked into one choice,” he says. “Start your search early, and work with established buyers and producers. Get involved in a local stocker sale, and talk with your local providers. Chances are they can help you generate a few different names to source from. Then you can go out have a look and have your pick.”
Immunization is only one piece of the equation. Blasi says that cutting bulls or those that have not been castrated at birth is also a riskier investment. The market views this as a detriment because the castration process is much more difficult on the calf than if it was done at a younger age. Castrating at an older age is also physically harder for the animal to recover.
“It’s mostly a humane issue,” he says. “There are people who specialize in these cattle because they have the facilities and expertise to care for them.”
The stocker cattle industry is built on the premise that farmers buy small cattle with the intention of achieving maximum weight gain in about 90 days. Most often, these cattle are grazed, meaning it’s imperative to provide enough good quality forage to sustain the herd.
“You’ll shoot for a daily gain between 1 1⁄2 to 3 pounds a day,” Blasi says. “A granular additive such as Rumensin or Bovatech may assist with feed efficiency. These provide supplemental energy and protein to assist in the digestion of lower quality forages.”
When the cattle start out thin and ragged, they’ll gain at a quicker rate on spring forage. That’s because they’re eating better than they previously had.
If you purchase spring cattle that are already fat and not conditioned from the winter and spring weather you run the risk of having your animals lose weight for the first month that you graze them. The key is providing enough space in the pasture for the cattle to lounge and ruminate, and carry low stress.
Detzel intensively manages his pastures, limiting the need to buy hay or provide feed. Last spring, he spent an hour each morning moving water, pasture line and minerals to give each pasture resting time for regrowth.
By mid-summer, he was moving pastures every few days. But Detzel never allowed access on any one lot for more than four days. He then rested the pasture for at least 30 days and sometimes as many as 60 days.
“The cattle will tell you if they’re not getting enough to eat,” he says. “They’ll have good-looking coats, and they’ll be spread across the pasture rather than balled into a group.”
Gut Monitoring
Monitoring the animal’s rumen fill provides a visual assessment of their nutrition.
The rumen fill is a triangle shaped area on the left hip of the cow. When the cow receives enough to eat, it’s flat and fleshy, rather than concaved in towards their hip.
“Do not overstock your pastures,” Detzel says. “New stocker operators tend to overestimate the amount of forage they have when they realize that they will not have to graze their [cattle] late into the season because they will likely be sold in the early fall.”
Unfortunately, Mother Nature doesn’t care about your plans. If the weather gets droughty and you have to feed hay, you can kiss those short margins and profits goodbye.
“My biggest piece of advice is to sit down with an extension professional, an NRCS grazing consultant or any of the other fine experts that inhabit our national agricultural agencies,” Detzel says. “These folks can help you set up your grazing, water and marketing plans. Best of all, they have likely seen and heard it all, so they can help focus and refine your year on grass.”
Know the Stocker Cattle Market
Buyers know what they want and will pay top dollar for it. However, they are quicker to take discounts for things they see as detriments.
Knowing what auctions pay more for or take discounts can help producers maximize their product. The 2011-2017 study Factors affecting the auction price of New York feeder cattle, by Minhao Yan, Michael J. Baker and Miguel Gomez evaluated the price per pound of 30,000 head of cattle. The results give New York farmers an idea for the ways people are getting paid at auction.
Certified Angus Beef is the market standard, with black Angus bringing premium prices and their red cousins a close second. Easter egg or multicolored cattle, yellowish colored cattle and anything with big ears tend to get a bad rap and discounted at auction.
Detzel has a few white cows in his herd and one with horns, which he knows are really going to get discounted.
Cattle that are thick, muscular and have records for immunizations also bring the best prices. Uncastrated bull calves and those with horns are significantly discounted, up to $25 per hundred weight.
Location & Load
Geography plays a significant role in prices. For example, cattle sold in New York auctions bring less money than in other beef-producing states.
Detzel paid to ship his cattle out of state in hopes of bringing in more money per pound. Load size also contributes to the price buyers are willing to pay. Even though the average herd size in the United States is less than 100 head of 500-pound cattle, buyers want to know a grower has enough cattle to make a sizable load.
“Visit with potential buyers and make them aware of what you have available,” Blasi says. “Maybe you’ll even have a chance for a private treaty.”
Detzel leverages his relationship with the producer he buys his calves from. Together, they go in on trucking and ship their cattle out of state to auction in Missouri. There, they’ll bring a higher price than New York auctions.
Shipping & Handling
When it’s time to ship the cattle, how they are handled can significantly impact their weight and ultimately the price they bring.
Stressed cattle drop weight quickly under stress. They can easily lose 40 to 50 pounds through intercellular water loss and manure production when they are kept in a holding pen for too long.
“We take two percent shrink off the top because of undigested feed in the digestive tract,” Blasi says. “The more stressed the animal is, the more potential you have for losing a lot of value.”
Success with stocker cattle is akin to walking a fine line. To make the most profit, it’s necessary to buy inexpensive animals. But being “too cheap” can end up eating into profits over the long run.
“Getting into stockers was a time-versus-return issue for me,” Detzel says, “and I didn’t have to give up my cattle all together. Being out with the herd in the morning moving line or water is the best way to start my day.”
This article about raising stocker cattle was written for Hobby Farms magazine. Click here to subscribe.
The Atmospheric Steam Canner was approved as safe for home food preservation ten years ago. However, it seems that many people have never heard of it. Here’s what it is and how to use it to preserve homegrown foods.
What Is a Steam Canner?
The one I have is a two-part pan set. The bottom pan has sides that are a few inches tall, and a rack fits inside the base. It has a large lid that covers the bottom pan, which has a steam vent.
It differs from the boiling water bath canner because you do not fill a large pot with water. You only fill a couple of inches of water in the base of the steam canner. Therefore, it requires less water overall and it heats up and is ready to use faster than a large pot of water.
Once the canner heats up and steam starts venting from the hole on the side of the lid, it’s time to start your timer. Similar to when your water bath canning and the pot begins a rolling boil, that’s when you know to start your timer per the recipe you’re following. That’s how we know it’s reached the safe temperature to preserve the food.
What Food is a Steam Canner Used to Preserve?
This canner allows you to safely preserve acidic foods, the same as a water bath canner. Any food that you can safely preserve in a water bath canner can be safely preserved in a steam canner (see “Important Notes” at the bottom of the article).
High-acid foods or foods that have been acidified and have a pH of 4.6 or lower can safely be preserved with the steam canner. That means vinegar pickles, jams, fruits, jellies, tomatoes, syrups, chutneys, and so on. Steam canning can be used for both hot packing and raw packing.
The processing times for the steam and water bath canner are the same. So, if your recipe directs you to water bath jam for 10 minutes, then you’d process it in the steam canner for 10 minutes. Any recipe that requires you to process for 45 minutes or longer will have to be processed in a water bath canner, as the steam canner does not hold enough water to safely boil for that long.
How Do You Use a Steam Canner?
1. Add water to the noted line in the base of the steam canner, 2-3 quarts, less or more depending on how much you intend to preserve. If I’m canning one batch of jam for 10 minutes, I would add less water. If I’m canning several batches, I’ll fill the water to the max-fill line. Add the lid on the pot’s base and turn the heat up so that the water warms.
2. Fill your jars as you normally would when water bath canning. Add lids and rings just the same.
3. When you’re ready to place your jars in the steam canner, turn down the heat, and slowly lift the lid AWAY from you, so that if there is any steam, it does not go in your face.
4. Place your jars of food on the rack. Return the lid on the pot’s base and turn the heat up to high. Once steam starts venting from the canner, you can start your timer per the recipe you’re following. My steam canner notes in the instructions that if the lid begins rocking and water is spurting out, to turn the heat down.
5. Once the food is done processing, turn the heat off on the canner and allow it to sit covered on the burner to cool down. After a few minutes, open the lid AWAY from you once again, to not burn yourself with steam.
6. Using canning tongs, transfer the hot jars to a towel-lined surface and allow the jars to cool completely (12+ hours) before touching.
Important Notes
Read the instructions that come with your canner, as different brands vary.
Remember to only use trusted recipes. No low-acid foods can be preserved in a water bath or steam canner. Only a pressure canner can safely preserve low-acid foods.
Remember that elevation determines your boiling point temperature, so consult your altitude chart for added timing if you aren’t sure.
Do opossums kill chickens? While the opossum will indeed kill a chick or chicken if it is hungry and the opportunity presents itself, this marsupial is actually much maligned.
Having an opossum in the area can actually be beneficial, especially if you live in a rural or agricultural zone.
Friend, Not Foe
Opossums help control the mice and rat population since these are a staple of the opossum diet. They also consume ticks and are reported to reduce tick populations by 90 percent. They also eat slugs and snails, which is a huge benefit to gardeners.
Opossums are also fastidiously clean, they are resistant to snake venom, and they are rarely rabid (although they can carry the disease). If you notice an opossum trundling around your property, it may be best to just let it be … especially if your flock, coop and run are secured.
Know Your Adversary
Native to South America, the opossum (Didelphis virginiana) established its presence in the United States and Canada during the 1920s. While it’s uncertain how the opossum arrived in North America, records indicate that this cat-sized omnivore was once farmed for both its grey-and-white pelt and its meat.
Although its natural habitat consists of forests and fields, the opossum easily adapts to inhabit agricultural and suburban zones. It is the only marsupial in North America: the females will carry their young in pouches just like kangaroo mothers.
Nocturnal by nature, the opossum emerges at nightfall for nine or so hours of activity before returning to its shelter just before dawn. Its keen eyesight—more than twice as sharp as human vision—allows it to see easily in the dark.
Opossums are opportunistic animals which is why you’ll sometimes find them with your chickens. They have adapted to eat anything: fish, frogs, insects, rodents and reptiles. A skilled scavenger, opossusms can survive on carrion and on the biowaste in our garbage bins and compost piles.
Orchards and vegetable gardens provide plenty of food for opossums … as do chickens and their coops. Despite its fearsome appearance—beady eyes, scaly pink tail and a mouth bearing close to 50 razor-sharp teeth—the opossum is a non-confrontational hunter. Opossums prefer to help themselves to eggs, chicks and nesting hens versus chickens that fight back or attack.
While missing chicks can be attributed not just to an opossum but also to a variety of predators, a dead chicken with its underbelly or chest torn open and its insides missing or scattered clearly indicates one or more opossums stopped by for dinner.
Gaining Entry
There’s always a possibility that you may encounter an opossum on your property. If you leave your garage door open, if you keep your trash bin outside, if you have an outdoor pet shelter with a food bowl, chances are an opossum will eventually come by.
Opossums can also find a way into the coop with your chickens simply by climbing your run’s fence.
Opossums are designed to climb. Each of their feet have five toes, including opposable thumbs, giving this animal the ability and agility to grip fence wiring quite securely (its tail is also prehensile). Once an opossum climbs down the other side of your run fence, it can just stroll right on into your coop.
A more likely reaction, however, is that it will “play possum.” The animal freezes and lies so still that it appears dead. If left alone, the opossum will recover from this catatonic state in one to four hours.
Just because the animal is playing possum does not mean he’s more easily handled in this state. Contact your local animal control officer or an animal-removal service.
Critter Countermeasures
Unfortunately, there is no fence tall enough to keep an opossum out. This talented climber will nimbly scale the tallest enclosure if it thinks there are easy pickings or there’s a safe shelter inside. To protect your chickens against opossums accessing your coop via your run, you’ll need to put a cover over it.
Some sort of permanent roof or a section of wire fencing that securely attaches to your existing fence should do the trick.
Do not use chicken wire, as this is not meant to keep intruders out but rather keep your flock in. Predators can easily tear through flimsy chicken wire, so avoid using this material at all. An added bonus to covering your run is that you will also deter aerial predators such as hawks and owls.
Other preventative measures include installing a motion-sensor light over your coop’s entrance, adding a rooster to your flock, and setting up live traps baited with fruit and kitchen scraps.
Opossums & Chickens: A Careful Coexistence
My husband Jae and I first noticed opossums on our acreage about five years ago, at about the same time we started having to live trap rats. (Our silly hens—and some unfortunate songbirds—kept setting off the kill traps.) My first thought was “Great! Another pest to deal with!” My second was, do opossums kill chickens?
By the end of the summer, our rodent problem was over. I haven’t seen a single rat or mouse since, although our neighbor regularly informs me that she keeps finding rodent remains in her yard.
I also know for a fact that our birds refuse to eat ticks. Even our guineas, when we had them, refused to eat ticks. But our property has been tick-free ever since the opossums arrived.
So, do opossums kill chickens? Yes. But their good outweighs the bad. We may not be all hugs and kisses, especially after we spent a very frustrating time trying to coax a juvenile opossum out of our Orpington coop. (The little thing kept playing dead on us and the Orpingtons were fussily clucking in the run, wanting to roost for the night.)
We finally scooped the little marsupial up with a garden hoe and sent him on his way, hopefully, to keep eating rodents and insects in a careful coexistence with our poultry … and with us.
This article about do opossums kill chickens was written for Chickens and Hobby Farms magazines. Click here to subscribe.