Categories
Farm & Garden

Using Rain Gardens & Bioswales to Manage Rainwater

Rain gardens and bioswales are gardening options that provide native habitats and manage excess rainwater simultaneously.

What Happens When We Get Too Much Rain Too Fast?

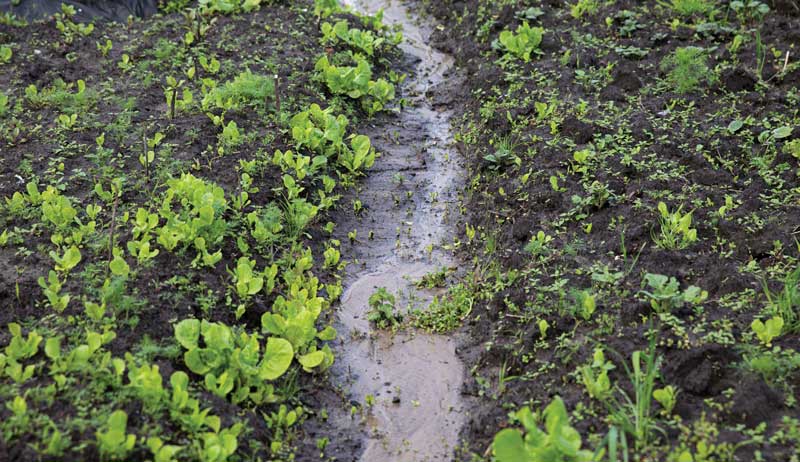
When our gardens get buckets of rainfall dumped on them in a more compressed amount of time, we’re at greater risk for flooding—and greater risk of losing precious topsoil in the process. Rather than slowly penetrating and subsequently filtering through layers of soil to recharge the local groundwater, extreme rainfall becomes fast-moving runoff.

If your soil is really compacted or, like most of us, you’re surrounded by asphalt roads, concrete driveways and similarly impervious surfaces, all that extra rainwater has a chance to spread out and flow even more quickly across these areas. As a result, the runoff remains above ground, making its way into nearby streams and rivers and taking the topsoil and its nutrients along with it.

Fortunately, we can prepare for these extreme weather events and preserve the rich topsoil we work so hard to build. By building bioswales and rain gardens into our landscapes, we can channel and slow that runoff.

Changing Environmental Conditions

No matter where you live and where you garden, odds are you’ve noticed at least some changes in your local weather patterns over the last several years. Throughout much of the United States, for instance, we’ve seen new extremes—more intense rains punctuated by prolonged periods of drought.

A 2019 research brief released by the policy-neutral nonprofit group Climate Central notes that for every degree Fahrenheit rise in temperature, our atmosphere can hang onto about 4 percent more water vapor. That means as temperatures go up, the stage is set for even heavier deluges when it does rain. Climate Central researchers analyzed the rainiest days of the year for 244 U.S. cities and determined that, “Since 1950, the wettest day of the year has gotten wetter in 79 percent of the cities analyzed.

“In addition to getting stronger, extreme downpours are happening more frequently than in the past. In 80 percent of the cities analyzed, the top 1 percent of rain events have been recorded disproportionately recently.” Just how recently? More than 1⁄3 of the cities Climate Central studied set their rainfall records since 1990.

bioswales rain gardens
Studiomiracle/Adobe Stock

What is a Bioswale?

You may already be familiar with swales. They’re long, narrow ditches or shallow basins typically positioned around homes and along roads to redirect storm water. These may be planted with grass, filled with stone, or even made from concrete. But what makes a swale a bioswale?

Modeled after Mother Nature, a bioswale incorporates natural elements that work together to filter and direct the runoff. These may include native perennial grasses and flowers as well as certain soil amendments. In part, the natural elements to be included depend on factors such as soil texture and how quickly water drains through a particular area. The land’s degree of slope matters, too. (Land that is nearly flat or, conversely, land that is very steeply sloped is ill-suited for a bioswale.)

What is a Rain Garden?

You can use bioswales to slow and direct stormwater runoff from your roof, driveway and other impervious surfaces, but where exactly should this runoff go? Bioswales work especially well when paired with rain gardens. Rain gardens are usually located in low-lying areas and include deeply rooted native plant species that, once established, can tolerate “wet feet” and drought conditions.

While native plants do some of the runoff-filtering work, the physical structure and layout of the rain garden are also important parts of the equation. Imagine the rain garden as a kind of basin complete with berms—built-up ridges of land—on all sides except for the side that receives stormwater runoff. 

Water from the gutters on your home and water being directed along any nearby bioswales flows into the rain garden site. The rain garden’s high berms help to hold the runoff in place long enough for it to be taken up by the deeply rooted plants. The stormwater runoff also gradually penetrates and drains through the rain garden’s layers of mulch and amended soil.

bioswales rain gardens
auntspray/Adobe Stock

How Do I Choose Between a Bioswales and Rain Gardens?

Should you choose to install your own bioswale and rain garden, their location, size and shape depend on several factors. Some of these include your current stormwater runoff drainage patterns, the texture of your soil, the rate at which water drains through it, and your growing conditions.

Stormwater Runoff

If you aren’t sure about the path your stormwater runoff currently takes, you might have to wait until the next heavy rain to carefully observe this. Take note of any areas in the yard with standing water as well as any spots that feel extra squishy. Snap some photos or draw a map to help you remember where excess water is going and which areas of your land may be eroding.

Soil Makeup & Infiltration

As for the makeup of your soil, if it is badly compacted or especially poor-draining—think heavy clay—you’ll need to remove and amend more of it than if it is already very light and sandy. Ideally, a combination of well-rotted compost, sand and topsoil is best.

Sometimes called the “soil infiltration rate,” the rate at which water drains through your soil is another critical piece of information to consider. A simple way to estimate this for your soil is to dig a hole that’s about 6 inches across and 8 to 12 inches deep. Fill the hole with water and wait until it has drained before moving on to the next step.

Once the hole is empty again, put a yardstick inside it and refill the hole with water. Make a note of the water level now and then again in an hour’s time. If at least 1⁄2 inch of water has drained, then this might be a suitable spot for your rain garden.

Sunlight

How much sunlight the area gets also matters. After all, this will influence the plants you’re able to choose for any bioswales and your rain garden.

Site Requirements

Finding the Slope

The spot you’re considering for your rain garden should be located at least 10 feet away from the foundation of your home. It should also have a slope of less than 12 percent. You can find an area’s percent of slope by placing two stakes at its highest and lowest points. Run a string from the base of the uphill stake to the downhill stake, making sure that the string is level where it attaches to the downhill stake. Measure the distance from the base of the downhill stake to the top of the now-level string. This is the change in the “rise.” Next, measure the distance between the two stakes. This is the “run.” 

Make sure your rise and run are both expressed in the same units of measure. Divide the rise by the run and multiply the answer by 100. This is your percent of slope.

Finding the Depth

Knowing the slope of a potential rain garden location will help you determine how deep the final product needs to be. As a rule, rain gardens built on a slope of less than 4 percent should be just 3 to 5 inches deep at their deepest points. For slopes of 5 to 7 percent, you’ll need to dig down 6 or 7 inches. Rain gardens built on slopes between 8 and 12 percent should be about 8 inches deep at their deepest points.

Ultimately, the depth of your rain garden, along with the square footage of impermeable surface you have, will influence your rain garden’s finished size. For example, say you have 800 square feet
of impermeable surface and your rain garden is going to be 6 inches at its deepest point. In this case, the rain garden should take up about 40 square feet. But, if your rain garden is just 3 inches deep, you’d need to double its footprint, making it 80 square feet instead.
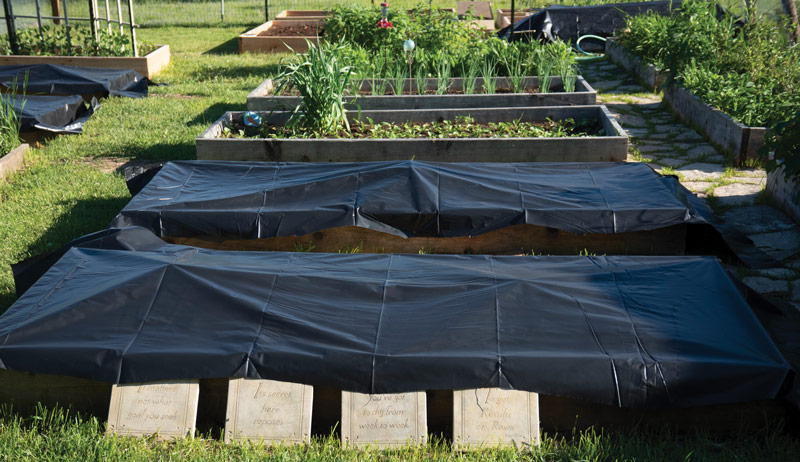
Set Up Timing

Depending on your rain garden’s size and depth, its excavation and shaping could take several days. So could amending heavy soil with sand and compost. Plan to cover the area with a large tarp between work sessions. (Oh, and don’t forget to ask your local utilities to mark any underground lines before you begin your big dig!) 

What Plants Grow in Bioswales and Rain Gardens?

Plants that perform best in bioswales and rain gardens are clumping, native grasses and sturdy, native perennial flowers with very deep roots.

Some common warm-season grasses that work well throughout much of the United States include:

  • sedges,
  • big bluestem, and
  • northern sea oats
  • river oats

Perennial flower options that can pull their weight in most rain gardens include:

  • swamp milkweed
  • bee balm
  • columbine
  • black-eyed Susan
  • joe-pye weed
  • queen of the prairie
  • cardinal flower

For best results, ask your county extension office or native plant society for rain garden plant recommendations to fit your specific microclimate. Also, it’s worth noting that some city and county governments do offer stormwater project grants for area residents looking to install their own bioswales and rain gardens. If one of your local agencies offers grants, you might be able to use one to help cover labor or plant costs.

This article about using rain gardens and bioswales to control rainwater originally appeared Hobby Farms magazine. Click here to subscribe.

Categories
Crops & Gardening

Popular Popcorn: 9 Varieties to Grow & More

Popcorn is as American as apple pie. The bursting sound and wafting smell of salty, buttery, goodness can be found at stadiums, carnivals, homesteads, and most notably, movie theaters.

Archaeological and genetic evidence of the origin of popcorn throughout Central and South America, particularly Guatemala, Mexico and Peru, is extensive. On a recent excursion to Peru, I learned that the country has more than 55 varieties of corn. When I sampled the popcorn, each large flake’s sweet flavor and shape surprised me.

There are two main structures of popcorn: mushroom and butterfly. The 2-inch pieces I sampled are known as mushrooms for their consistent puffball form. Confectioners prefer this variety for its shelf life. In movie theaters, however, butterfly, aka snowflake, is the mainstay for its texture and mouthfeel.

Pop History

To learn more about the history of what might be the oldest snack food, I contacted Dolores Piperno, senior scientist emerita of the Smithsonian Tropical Research Institute and Smithsonian National Museum of Natural History.

“The wild ancestor of corn is a wild grass called teosinte [Zea mays ssp. parviglumis],” she says. “The earliest maize discovered so far was like a popcorn, and it turns out that teosinte grains can be popped.”

Because both grains have similar types of endosperm, both react to heat the same way.

“Scientists wondered for a long time how teosinte was used as a food by the earliest cultivators of corn, since its kernels were enclosed in the fruit case,” she says.

It appears teosinte was popped in order to be eaten. It wasn’t until later in its evolution that other types of maize, such as field, flint and sweet corn, were bred.

“Geneticists compare the DNA sequences of modern varieties of corn with related wild species that can still be found growing today and that could potentially be ancestral, and the proof is hard and firm,” Piperno says. “Also, importantly, within the past decade or so, geneticists are carrying out ancient DNA studies directly on remains of crops excavated from archaeological sites. These analyses have moved forward our understanding of how corn evolved through thousands of years of agriculture from teosinte.”

kids selling Bubba Bug Popcorn

Pop Stars

Ethan and Natalie Pratt, ages 12 and 10, respectively, own Bubba-Bug Popcorn. Five years ago, they asked their mom if they could open a lemonade stand. She told them that lemonade stands don’t work on an empty country road. So these two inspiring entrepreneurs came up with the idea of selling popcorn. They chose and planted varieties, hand-picked each ear at harvest time, shelled the corn with an old hand-cranked sheller, and packaged it up and delivered it to customers. They’ve been growing their business ever since. Here is some planting advice from these young, but seasoned farmers.

  • Wait to plant until the soil temperature is above 50 degrees and there is no threat of frost. Be sure to plant into a seedbed of fine soil. This might require a couple of passes with the roto-tiller. Keep your rows narrow, and plant at a high population to encourage pollination.
  • We planted by hand for three years, tried to use our grandpa’s corn planter one year and finally purchased a vegetable seeder. We used that this year. Planting was so easy. It ensured even seed depth, spacing and soil coverage.
  • For harvest, wait until the popcorn is dry before picking. Picking too early can result in mold growing on your kernels. It should have a moisture content of 13 to 15 percent. We pick by hand and shuck the ears right in the field.

Find out more about the popcorning Pratt siblings at Illinois Farm Girl.

Popcorn Popularity

The popularity is like the act of popping itself: slow at first, with a few booms, followed by a firestorm of kernels exploding into delightful puffs of air and starch.

By the mid 1800s, it was a prevalent snack food because of the entertainment value of its popping process. In 1885, Charles Cretor invented the first steam-powered popcorn maker. This allowed vendors to sell the snack at outdoor sporting events, circuses and fairs, a large advantage over the potato chip, which needed to be made in small batches inside a kitchen. Street vendors took advantage of popcorn’s appealing aroma to boost sales. The only place popcorn wasn’t available? Inside movie theaters. Imagine an audience full of popcorn eaters, chomping away while watching a silent movie!

ears of heirloom popcorn laid out on a table
Baker Creek Heirloom Seeds

Most popcorn sold during this time was white because yellow corn wasn’t commercially grown and cost twice as much. However, popcorn vendors preferred yellow corn, which popped more, causing more volume for less seed. The yellow tint also gave the impression of a butter coating. The public started refusing the white variety at markets, requesting “movie popcorn.”

By 1930, nearly 90 million people every week went to the movies. Movie theater owners’ eyes glazed over with dollar signs, as patrons came to the theater with street popcorn in hand. The release of talkies and sound movies also persuaded owners to allow the crunchy snack into theaters.

At first, owners leased space to vendors in the foyer or on the street in front of the theater. By 1945, newer theaters contained dedicated areas for popcorn to be made and sold. At this time, more than half of the popcorn consumed in America was eaten at movie theaters.

a farm bureau photo showing an ear of field corn, an ear of sweet corn and an ear of popcorn for comparisons
Rhodora Collins/DeKalb County Farm Bureau

In 1946, engineer Percy Spencer conducted experiments at Raytheon Corp. with a magnetron. After discovering that a chocolate bar melted nearby, he experimented with other foods. When corn kernels were close, they popped, and the creation of microwave popcorn led to the invention of the microwave. The first commercial microwave measured 6 feet tall, weighed 750 pounds and cost $5,000 at the time (nearly $70,000 in 2017 currency). In the 1970s and ’80s, counter-sized microwaves became widely available.

Today, Americans consume 14 billion quarts of popped popcorn annually, or about 43 quarts per person. Seventy percent is eaten in homes, while 30 percent is eaten in places such as theaters, stadiums and schools.

9 Varieties to Grow

Today, white popcorn accounts for 10 percent of commercially grown popcorn, with yellow being the most popular. Try these varieties to add a pop of color to your homestead.

1. Burro Mountain

This ancient white popcorn produces two to three, 4- to 6-inch-long ears per stalk. It was first found in a pottery container dated to be 600 to 1,000 years old in the Burro Mountains of Grant County, New Mexico.

2. Chapalote

This flint/popcorn may be the oldest corn variety grown in North America. Carbon dating shows that it could be 4,000 years old. Long, slim ears are filled with shining-amber to dark-brown kernels. It also has great drought and heat tolerance.

3. Cherokee Long Ear

This variety produces a beautiful blend of brightly colored long ears, 5 to 7 inches long; they are wonderful as fall decorations as well as popping.

4. Dakota Black

Dark reddish-black ears of corn are quite attractive for fall decorations or popping into delicious popcorn. This variety is easy to grow and does well in almost all growing climates.

5. Glass Gem

This variety of popcorn produces translucent multicolored kernels that shine like glass. The 3- to 8-inch ears are decorative but also edible and tasty. Sturdy plants reach 9 feet tall and throw numerous side-shoots where the season is long enough.

6. Indian Berries

three popcorn indian berries sitting on granite table with a blurred background
Baker Creek Heirloom Seeds

These 4- to 5-foot plants yield as many as four multicolored ears each. The ears are as long as 5 inches and include shiny kernels in red, blue, purple, yellow and white. Ears are produced curiously low on the plants.

7. Mini Pink/Blue

These cute, 2- to 5-inch ears are independently indigo or mauve to rose pink. Plants can reach 6 to 7 feet and yield as many as four ears per stalk. When popped, the kernels have a nutty flavor.

8. Strawberry

This is a popular, cute variety whose little ears of corn look just like big strawberries. The 4-foot plants produce two to four ears each.

9. Smoke Signal Indian

This traditional Native American corn makes a stunning ornamental display and can be dried and popped for a tasty snack. Tall, sturdy plants create a natural trellis for climbing beans.

Other Seeds That Pop & Puff

While popcorn is certainly king, there’s a whole world of popped grains out there. Other grains you can try popping include:

  • Amaranth
  • Barley
  • Millet
  • Quinoa
  • Sorghum
  • Wheat Berries

Growing Advice

Ginger Grubb and her husband Bill began growing popcorn soon after they got married in 1972. They live on a heritage farm in south-central Iowa that has been in his family since 1874. “My father asked if he bought some good tasty seed he had found, would Bill plant it for him,” Ginger says. “We planted a couple of rows alongside the field corn, and we picked it by hand in the fall. The neighbors liked it so well that we planted a few more rows and then a couple of acres. In 2010, a friend of mine and I went into business selling popcorn to a few grocery stores. We were planting eight to 10 acres of popcorn.”

Today, Grubb’s Premium Popping Corn (www.grubbpopcorn.com) plants more than 40 acres.

Once you have selected a variety that is suited to your area, sow the seeds directly into the ground. Several short rows, similar to growing sweet corn, will ensure good pollination. Don’t plant sweet corn in the same area as popcorn as they will hybridize. Water, fertilize and weed regularly.

ears of white and dark popcorn for sale in a wicker basket
Angela N/Flickr

Harvest

“The key to having popcorn pop is the amount of water in the hull,” says Wendy Boersema Rappel, a spokesperson for the Popcorn Board. “Processors dry popcorn to about 131⁄2 percent moisture.”

Allow the cobs to dry in the field as long as possible. When picked, the kernels should be hard and the husks completely dry. Place the ears in mesh bags, and hang in a warm, dry, well-ventilated area. Once a week, try popping a few kernels. If the test kernels pop well and taste good, harvest the rest of the kernels. If the popcorn is tough or the popped kernels are jagged, they are too wet and need to dry longer.

“To get a good crop, we check the moisture levels in the fall before harvesting and pick when it is 141⁄2 percent or close to that,” Grubb says. “If it is too dry or too wet, then it doesn’t pop at all well.”

ears of dried dark red popcorn gathered in bundles on a table for sale
Jim the Photographer/Flickr

Storage

“Storage is important to keeping that moisture in, so keep popcorn in a sealed container, away from extreme heat sources,” Rappel says.

When stored properly, popcorn will retain its popping quality for several years. Make sure the area is rodent-proof. If stored popcorn doesn’t pop, it might be too dry. Add 1 tablespoon of water to a quart of popcorn. Shake until the popcorn has absorbed the water, and attempt a few trial runs.

People have always loved the taste and smell of popcorn,” Rappel says. “Today’s consumer also understands and appreciates the farm-to-table simplicity of popcorn, that it’s a healthy snack fitting current concerns [non-GMO, gluten-free, whole grain, naturally low in fat and calories].” It’s also inexpensive.

While Rappel doesn’t have a favorite variety, she likes to keep it simple using a stovetop with oil and a touch of superfine popcorn salt.

“When I make a treat, my popcorn usually contains melted peanut butter and chocolate,” she says. “Popcorn has been around for thousands of years. Its staying power has a lot to do with its great taste, but also the fact that it’s a bit magical.”

This story about popcorn originally appeared in Hobby Farms magazine. Click here to subscribe.

Categories
Crops & Gardening

How to Grow Begonias From Seed: Get Started Early

Advice for how to grow begonias from seed is simple: get started early. While prime seed-starting time is still weeks away for most parts of North America, there’s one plant that requires a bit more time to grow. Begonias are beautiful annuals that are both shade-loving and deer-resistant and they make a beautiful addition to almost any landscape. If you want to grow some of your own, you might be surprised to learn that, unlike most other annual flowers, mid to late January is the perfect time to start begonias from seed.

Why Start Begonias From Seed

Annual flowers are definitely not the most expensive plants at your local greenhouse, but if you grow (or sell) a lot of them, starting your own from seed can save you a ton of money. While starting marigolds, cosmos and salvias from seed is as simple as can be, when you start begonias from seed, it requires a bit more time and effort.

As with many other plants, starting begonias from seed, rather than buying transplants from a grower, means you’ll have a better varietal selection to choose from and you’ll get a lot more bang for your buck. Most commercial growers focus on growing just three or four popular types of begonias, but there are dozens of selections you can choose from when growing begonias from seed.

How to Grow Begonias From Seed: Four Steps

Begonia seeds are extremely tiny. In fact, each seed isn’t much bigger than a speck of dust. Handling these miniscule seeds can be difficult, though you can purchase pelleted seeds to make the job a bit easier. Add that to the fact that begonias take a very long time to germinate, and that’s probably why most folks shy away from starting them from seed. However, once you get the hang of starting begonias from seed, you’ll discover your efforts are well worth it.

1. Keep Things Sterile

Use new seedling trays or flats to plant begonias from seed. The plants are prone to developing fungal diseases, including damping off and botrytis, so new or disinfected seed trays are a must. You’ll also need new sterile potting soil that’s formulated specifically for seed starting.

2. Planting the Begonia Seeds

Once your seed trays are filled with sterile potting mix, it’s time to plant your begonia seeds. Begonias need light to germinate, so simply broadcast the seeds across the surface of the potting mix and press them against the surface of the soil with your fingertips or a flat piece of cardboard. Do not cover the seeds. Try to distribute them evenly across the soil, but it’s okay to have them spaced fairly closely. Begonias always need to be transplanted when they’re young, so if the seedlings end up too close, it’s no big deal; you’ll be separating them later anyway.

3. Watering the Newly Planted Seeds

When I start begonias from seed, I water the newly planted seeds in with a mister, rather than a hose nozzle, to make sure they stay in place and don’t float away.

4. Germination & Growth

Cover the seeding tray with a sheet of clear plastic or a humidity dome, and place the tray under grow lights that run for about 14-18 hours per day and stand about 2-3″ above the tops of the trays. Put heat mats under the trays to improve and speed germination. Some varieties of begonias can take weeks, if not months, to germinate, so don’t give up on them even if it seems to be taking forever. Make sure the seed flats don’t dry out; water them with a mister or spray bottle whenever necessary. Remove the plastic or humidity dome as soon as the seeds start to germinate. Raise the lights as the plants grow.

When Is the Best Time to Transplant Begonias Started From Seed?

As soon as your begonia seedlings develop their first true leaves, it’s time to transplant them. Use a spoon or spatula to lift a section of young plants up out of the tray and then use your fingers to gently tease them apart. Once separated, replant the begonia seedlings into nursery 4 packs or small plastic pots of new sterile potting soil.

Keep the pots or nursery packs well watered and continue to keep them under the grow lights for 14-18 hours per day. Once the danger of frost has passed, it’s time to begin to move your begonias outdoors for a few hours per day. Gradually increase the amount of time they spend outdoors over the course of two to three weeks until they are outdoors full time. This process of hardening off means a reduced chance of transplant shock and sunburn once your begonias are planted outdoors permanently.

Which Begonias Should You Start From Seed?

There are many types of begonias you can start from seed. Some types, like rex begonias, are easier to grow from root or leaf cuttings, but the experience of starting other types from seed is lots of fun. When trying to start begonias from seed for the first time, I recommend beginning with wax begonias, Dragon wing begonias, Angel wing begonias, cascading begonias or tuberous begonias.

This article about how to grow begonias from seed was written for Hobby Farms magazine. Click here to subscribe.

Categories
Poultry

How to Prevent Frozen Chicken Eggs in Cold Weather

Frozen chicken eggs in winter can be tough on a chicken keeper and ultimately crack if left out. Chickens usually do just fine when the mercury falls and the cold weather sets in. Many breeds are cold-hardy and can live in an unheated coop all winter in temperatures below freezing.

Eggs, on the other hand, don’t fare as well. As the egg temperature drops, the yolk and white expand, pressing against the shell. Eventually, visible cracks appear in the shell or tiny hairline cracks occur that aren’t visible to the naked eye.

Can You Eat Frozen Chicken Eggs?

Although frozen chicken eggs are usually still fine to eat as long as the inner membrane hasn’t broken (just allow them to slowly defrost in the refrigerator), the texture can change a bit and you might find them a bit grainy. Put any frozen eggs you collect in a bowl to defrost (not in an egg carton), because if there are any hairline cracks you didn’t detect, as the egg defrosts, the egg white can seep out and make a mess.

However, if the eggshell has visibly cracked and the membrane is broken, it’s best to discard the egg. There’s too much chance that bacteria or other germs have touched the oozing whites and therefore contaminated the entire egg.

Even though bacteria grow more slowly at cold temperatures, freezing won’t kill all bacteria, so there is still a chance of contamination. A slightly cracked egg with an intact membrane is probably still safe to eat, but to err on the side of caution, I recommend cooking it well, and then feeding it to your chickens instead. There is no use taking any chances, and the birds will appreciate the treat.

eggs freezing frozen prevent
Lamerie/Flickr

How Do I Store Chicken Eggs in the Winter?

Normally, farm-fresh eggs can be left out at room temperature for a few weeks on the kitchen counter and still be fine to eat because the bloom or natural coating on the eggshell keeps out air and bacteria. However, if you collect eggs that are cold to the touch, condensation will probably form on the shells once they start to warm up, which can make the properties of the bloom ineffective, so it’s good practice to refrigerate your eggs in the winter.

You don’t need to wash them until you’re ready to use them. One nice thing about winter: All the mud and chicken manure is usually frozen, so eggs generally stay cleaner.

Five Ways to Prevent Frozen Chicken Eggs

Preventing frozen chicken eggs can be a challenge in the winter if you live in a cold climate. Unless you stay home and can check your nesting boxes many times throughout the day, you’ll find frozen eggs. Although some chicken keepers add artificial light in coops to nudge their chickens to continue laying through the winter, I prefer not to for several reasons—partly because I believe chickens need that natural break that their bodies signal them to take at the onset of shorter days. That way, egg production naturally slows considerably, and my chances of having eggs being laid, much less frozen, is greatly reduced.

However, new layers will continue to lay through their first winter without added light, and even older hens will lay the occasional egg, so it’s best to be prepared in case you have hens laying through the cold winter months. These are simple things you can do to mitigate the problem of frozen eggs.

1. Check the Coop Often

Collect your eggs from the coop as often as possible during the day. Depending on the temperature where you live, that might mean every couple of hours. If you work outside the house all day, enlist a neighbor who might be home to check for eggs several times a day. Egg collecting is an easy job for kids, so if your children leave for school after you leave for work or get home from school before you arrive home, be sure they check the boxes and collect any eggs they find.

eggs freezing frozen prevent
Lisa Steele

2. Consider the Nesting Box Location

If you live in a cold climate and are building or buying a new coop, think about the location of your coop. Position your coop in full sun with the nesting boxes facing east. This way, the boxes are warmed from the rays of the rising sun early each morning. Interior boxes, meaning those enclosed within the coop, will stay warmer than those attached to the outside of the coop.

3. Insulate the Nesting Boxes

An egg is almost 100 degrees when it emerges from the hen, so it will take several hours to cool sufficiently to freeze. The warmer you keep the nesting boxes, the longer it will take to cool.

Adding insulation to your boxes is a great idea, but be sure the insulation is protected so your chickens can’t peck at it and eat it. If that’s not an option, line the sides of the boxes with a few layers of cardboard cut to size and fill each box with a nice thick layer of straw.

If you normally use shavings in your nesting boxes, consider switching to straw for the winter. Straw is hollow, and those hollow shafts will retain the warmth from the hen’s body after she leaves the nest, keeping the boxes warmer longer. If your nesting boxes are the type that jut out from the outside wall of the coop, consider wrapping them in dark plastic tarps and stacking hay or straw bales around them to further insulate them.

4. Add Curtains

Hanging curtains across the front of the nesting boxes can also help keep the boxes warmer longer and prevent frozen chicken eggs. Use an old wool blanket or sweater, a piece of burlap or even empty feedbags for maximum heat retention. It doesn’t have to be fancy; you can simply staple a length of fabric to the top of each box, leaving a small space open for your chickens to enter and exit.

5. Don’t Discourage a Broody Hen

Chickens don’t often go broody in the winter, but if you find yourself with a broody hen, consider letting her sit. She’ll keep the eggs warm for you until you can collect them.

eggs freezing frozen prevent
Lisa Steele

5 Frozen Chicken Egg Handling Tips

1. If an egg is cold to the touch, refrigerate it and then rinse it in warm water before using.

2. If an egg is frozen but has not cracked, go ahead and refrigerate it. It should be perfectly fine to eat after it defrosts. Again, remember to rinse it before cooking with it.

3. If the egg is cracked but the membrane seems intact and the egg isn’t visibly dirty, you can still use it, but cook it right away. Be sure to scramble and cook it well – no soft-boiled or eggs sunny-side up please!

4. If the egg is cracked, the membrane broken and the white oozing out, toss the egg or cook it right away and feed it to your chickens or dog. Their stomachs and digestive tracts are better able to handle bacteria than we as humans are.

5. If the egg is cracked, oozing and dirty, then discard it. There is no sense in taking unnecessary chances.

Is Supplemental Heat a Good Idea?

Heating your chicken coop to prevent frozen chicken eggs might seem like the most logical way to keep your chickens warm and prevent eggs from freezing. However, think twice before installing a heat lamp in the coop. Each winter, chicken coops, barns and even homes burn down because heat lamps start fires in coops. Lamps can accidentally fall or be knocked down, and bulbs can shatter. The combination of electricity, a hot bulb, dry coop litter and chickens is a volatile mix that too often leads to property damage and death. Even a regular light bulb hung over nesting boxes will usually generate enough heat to prevent eggs from freezing, but that can also be a fire hazard and a risk I’m not sure is worth taking.

A safer way to heat your coop is to use a radiant panel heater, but I don’t recommend that either. The basic danger of heating your coop? If you lose power, your chickens haven’t been allowed to slowly become accustomed to the falling temperatures, so they will face extreme cold and be unprepared for it. Like most animals that live outside, they handle cold temperatures by being exposed to them gradually.

Think About Adding Ducks to Your Flock

I do have one last suggestion if frozen chicken eggs are a problem: Think about adding some ducks to your flock. Ducks lay eggs during the hour or so before dawn. The beauty of this is that you can then normally collect the eggs when you open up the coop and feed your flock before heading off to work, thereby not having to worry about eggs being left outside all day.

Ducks lay eggs on the coop floor in the corner and like to cover them with straw to hide them. Of course, this helps keep their eggs warmer longer. Duck eggs are also about 30 percent larger than chicken eggs, so it takes them longer to cool down. In all my years raising chickens and ducks, I have found a few frozen chicken eggs each winter but never a frozen duck egg.

Ducks and chickens can coexist peacefully in the coop, eat the same feed and share the same run. Ducks also tend to continue laying through the winter without added light in the coop. So think about expanding your flock to include a few ducks.

Even if ducks aren’t in the cards for you, instead of heating your coop, consider trying a few of the other methods mentioned in this article to keep your eggs from freezing. Eggs do become a precious commodity in the winter for most of us chicken keepers who don’t use artificial lighting. As production drops off considerably, no one wants any eggs to go to waste, so it’s important to prevent the few eggs your chickens lay in the cold months from freezing.

This article about preventing frozen chicken eggs was written for Chickens magazine. Click here to subscribe.

Categories
Poultry

Can Chickens Eat Wild Bird Food?

Can chickens eat wild bird food? In the past decade, there have been a handful of times that I’ve looked out my kitchen window, expecting to see nuthatches and chickadees at the wild-bird feeders hanging on my deck, only to find one of my hens precariously perched on the deck rail, happily gobbling up bird seed. I was amused at first. But the hilarity curtailed quickly when I realized how much birdseed my Orpington oinkers cost me.

I eventually switched to squirrel-proof—and poultry-proof—feeders, which solved that situation. Still, whenever I haul out the sacks of feed to refill the wild-bird feeders, my chickens suddenly dash toward the deck, hoping to get some seeds scattered their way.

I shared this story with an old friend not too long ago. Karen doesn’t keep chickens, but all colors, shapes and sizes of wild bird feeders literally bedazzle her deck. She smiled as she visualized my Buff Orpington hens gorging themselves at my tube feeder. She then asked me, “Well, why not?”

Can Chickens Be Fed Wild Bird Food Exclusively?

Why not? I schooled my expression and changed the subject. But once I was home I practically ranted at my husband, Jae, about this exchange.

Feeding chickens bird seed, I remarked. Can you imagine? Jae just looked at me and replied, “Well, why not? They’re already eating it.”

When he saw my bewildered expression, he continued that surely it would be easier to just buy more sunflower and safflower seeds than to also buy starter, grower and layer rations.

Two thoughts sprang to my mind.

One, my husband obviously was not reading all of my articles. Two, if Jae thought feeding our chickens a diet of bird seed was acceptable, then there surely must be other flock owners who might harbor the same mistaken notion.

Can Chickens Eat Wild Bird Food Bottom Line:

Can chickens eat wild bird food? In addition to not having the right nutrients, wild bird feed is also high in fat and calories, neither of which are good for domestic chickens. A handful of sunflower seeds tossed to a flock every now and then as a treat is fine. Feeding chickens nothing but wild bird feed can start them down a dangerous path of bad health … or worse.


Read more: Provide winter shelter for wild birds!


3 Reasons Chickens Should Not Eat Wild Bird Food Exclusively

1. Cost Effectiveness

Depending on the manufacturer and the type of feed — starter, grower, or layer rations — a 50-pound sack of chicken feed costs approximately $17 (at least it does here in Michigan). A 40-pound bag of black-oil sunflower seed, however, costs $27. That may not seem like a huge difference, but it adds up. A 200-pound poultry feed purchase comes out to $68, while a 200-pound sunflower seed purchase totals $135. The wild-bird feed prices out at twice the cost of the poultry feed.

2. Biosecurity Issues

Migratory birds can carry and transmit such infectious bird diseases as Highly Pathogenic Avian Influenza (HPAI) and exotic Newcastle disease (END) to backyard flocks. Research conducted by a team including Sonia Hernandez (professor of wildlife disease at the University of Georgia’s College of Veterinary Medicine) detected 14 wild bird species—all considered at high risk for pathogen transmission—regularly entering backyard chicken coops to share the food and water meant for the flocks and a total of 72 species intermingling with chickens.

One can only assume that the contamination rate would only increase if backyard flocks were fed a diet intended for wild birds.


Read more: Make sure you provide feed for the age and stage of your chickens!


3. Nutritional Deficiency

Poultry feed is scientifically formulated to provide chickens with the nutrition they need for proper growth and development at each stage of their life. If you’re wondering can chickens eat wild bird food, without the right balance of vitamins, minerals and nutrients, poultry can fail to thrive, suffer from deficiency-related conditions, and become incapacitated if affected severely enough.

It is crucial to provide chickens with the right diet to keep them healthy. It is for this same reason that our flocks cannot be fed scratch grains or any other supplement as their main nutritional source.

This story about can chickens eat wild bird food was written for Chickens magazine and is regularly updated for accuracy. Click here to subscribe.

Categories
Poultry

Do Chickens Have Belly Buttons? Chick Navel Health

Do chickens have belly buttons? It’s a common beginner question. Even though a chick hatches from an egg instead of being born from its mother’s womb, it still has a “belly button.” However, the navel on a chick is more difficult to find, especially on a healthy newborn. 

A poorly closed navel is a clear sign there’s something wrong with the chick. And it may indicate a problem with your incubator or incubation techniques.

A chick’s navel is one of the most vulnerable places for bacterial and fungal infections. So it’s important to understand what a chick’s belly button tells you.

How Is a Chicken Belly Button Formed?

Do chickens have belly buttons? A belly button is basically a scar left behind from the umbilical cord. In unborn human babies, the umbilical cord connects the baby’s belly to the mother’s placenta to provide the blood supply the baby needs to survive.

Because a chick develops inside an egg instead, do chickens have belly buttons? Yes, the umbilical cord is attached to the yolk sac where it gets much-needed nutrition. A few days before hatching, the chick absorbs the small intestine and the remaining yolk sac inside its body. This leaves behind a navel at the entrance.

“From day 16 to day 19, the small intestine, or umbilical loop, retracts into the growing body wall,” says Eric Gingerich, doctor of veterinary medicine and technical poultry specialist with Diamond V, a global animal nutrition and health company.

“Then, the yolk sac is drawn into the body cavity, which is directly connected to the small intestines through the yolk stalk. By day 20, the yolk sac should be completely inside the body and the navel should be fully closed by hatching. A ringlike muscle called the umbilicus becomes the future navel.”

Maurice Pitesky, doctor of veterinary medicine with the UC Davis School of Veterinary Medicine and Chickens Poultry Science columnist, adds that chicks “get their calories and nutrients from the yolk sac, which continues to serve as their main source of nutrition for the first two or three days of life.”

chick chicks navel navels chickens
Anneka/Shutterstock

Do Chickens Have Belly Buttons? Finding the Navel

Do chickens have belly buttons? Yes. A well-closed belly button is a good sign of health in a newborn chick. And it’s usually well hidden beneath its soft down. Even if you hold the chick and run your finger over it, you could still miss the navel.

But it’s there.

“In a healthy chick, it’s very hard to find, because it’s smooth and dry, but it’s just below the tail. In a poorly hatched chick, it shows and can be an issue,” says Shelley McBride Lynch, who raises laying hens and Cornish cross chickens, among other things, as the owner of 3F’s Feathers-n-Fur Farm. She’s also the owner of Oklahoma’s first and only state-inspected poultry slaughter and processing establishment, 3F’s Poultry and Rabbit Processing.

Gingerich further explains that a normal navel appears as a dry, sealed hole in the body wall. It’s located just below the anus of the chick under the feathers. Blowing on the underside of the chick will reveal its navel.

“Hold the chick where you’re looking at its ‘business end’ and the belly button is about two fingers south of the cloaca,” Pitesky says. “You’ll see a little nubbin that should be clean and closed. If it’s red or hot, it implies there’s an infection of the navel.”


Read more: Watch out for these conditions in incubated chicks.


What Can Cause Chicken Belly Button Issues?

Hatching your own eggs requires ideal incubation conditions to ensure healthy chicks. When conditions are less than satisfactory, your chicks may suffer. One of the signs that something went wrong is a poorly formed belly button.

Depending on the navel problem, external issues affecting your chick could be a factor. However, different incubation issues are often the cause.

“When the naval doesn’t close properly, it’s usually a sign that something went wrong during incubation, especially if there’s an infection,” Pitesky says. “You must maintain as sterile an environment as possible and have really clean incubators. Poor hygiene in the incubator and in the brooding area cause most navel abnormalities.”

Incubation Issues

Gingerich points out that various problems during incubation can also cause navel issues in a chick. He stresses that proper temperature and humidity conditions throughout incubation are needed, so the synchronization of the retraction of the yolk sac and intestines by day 20 can take place. 

“Abnormal navels can result if the temperature during incubation is too high after day 16,” he says. “Or if the temperature and humidity conditions resulted in too little or too much moisture loss, which may be caused by low or excessively high ventilation rates. Also, trying to hatch eggs you’ve stored longer than seven days or from breeder birds older than 50 weeks may result in more issues with bad navels.”

High temps can make a chick hatch too fast, leaving part of the yolk sac out when the hole closes.

“Low temps can make a chick small and weak and unable to suck the yolk residues up,” Lynch says. “If ventilation keeps too much humidity inside, it could make the birds full of water, leaving no room for the final taking up of the yolk. A long or short hatching period can also affect the absorption rate and naval closure problems could occur. Trying to hatch different ages of eggs at the same time can also lead to problems with belly button closure.”

Signs of a Bad Belly 

According to Pitesky, a well-formed belly button should be clean and fully closed and never be red, hot to the touch, or smelly or have anything coming out of it. If you notice wet, sticky down, it’s likely a sign of a leaky, unhealed navel.

Discolored navels and unabsorbed yolk sacs may also be a sign of omphalitis, also known as yolk sac infection. 

A chick with minor navel problems may survive. But they may grow more slowly or have lower weight if bred for slaughter. More severe naval issues could lead to death, often occurring shortly after hatching. 

“Wet, unhealed navels can lead to infections. They serve as an entry point for bacteria,” Gingerich says. “Also, abnormal navel closures mean the incubation conditions weren’t correct and poorer performance of the chick can be expected.”

4 Signs to Watch For with a Chicken Belly Button

1. Black buttons or bruised navels from too low or too high temperatures in the hatcher after transfer

2. String navels from excessive cooling caused by low temperatures after transfer or spraying hatch eggs after transfer

3. Open or unhealed navels due to incubation temperatures outside the normal range

4. Infected navels from poor sanitation of the hatch trays or use of floor or dirty nest eggs for hatching

chick chicks navel navels chickens
TEA OOR/Shutterstock

Care for Common Chicken Belly Button Issues

For some navel issues, it’s generally advised that you don’t do anything and let nature take its course. A common issue that’s generally okay to ignore is a dry navel. Even rough, dark navels are less risky than wet navels.

In these cases, the navel may simply have dried remains of the umbilical cord on it. It shouldn’t cause health issues if it remains dry.

“As long as the navel is closed and not wet, you shouldn’t do anything,” Gingerich says. “Even if the chick has an ‘outie’ belly button, as long as the navel isn’t bleeding or wet, do nothing.”

Pitesky agrees that you shouldn’t be as concerned with a dry navel. Clean and dry is what you want—not hot, not red, not inflamed, not wet. “A scab should form,” he says. “Scabs do better in dry conditions, instead of moist, as far as preventing infections.”

On the flip side, if a chick has a wet, leaking belly button, it’s probably not properly closed and is basically an open wound. This wound can allow bacteria to enter a very sensitive part of the chick’s body cavity, where internal organs and the rest of the yolk sac sits.

This area provides an ideal place for bacteria to breed. Infection could cause the chick to die within the first week.

“Treat it just like a wound and keep it from becoming infected,” Lynch says. “Use creams for fungal and bacterial infections and keep it clean.”

“Be sure to provide a clean, dry brooding environment,” Gingerich says. “And sanitize the navel with alcohol and iodine disinfectant solution.”


Read more: Check out these tips for incubating a clutch of eggs!


Should I Leave or Remove Pieces of the Umbilical Cord? 

There is some debate on what to do if a piece of the umbilical cord is still attached to your chick. Generally, this isn’t a sign there’s something wrong with the chick. Many experts advise leaving it alone.

However, it’s possible your chick will be at a higher risk of developing an infection. Lynch sides with those who advise leaving it alone. He says it should harmlessly fall off on its own in time. 

Pitesky adds that not only should you leave it alone and wait for it to fall off, but you should never pull it. “If you pull on the umbilical cord, you could pull the intestines out, causing a hernia,” he says. “If you try to push the intestines back in, you could cause strangulation of the intestinal loop and kill the chick.”

“This is called a string navel and you can remove it safely by clipping it with scissors,” Gingerich says. “Do not pull it out! Pulling out the remnant tissue may open the navel allowing an entry for bacteria.

“String navels are caused by low temperatures during the hatch process leading to a slowing of the retraction of the yolk sac. This means that the naval was open longer than normal during hatch and exposed to a relatively higher bacteria level than a normal hatching chick. Chicks with string navels should be considered at risk for omphalitis.”

Poorly closed belly buttons affect chick quality and may cause higher mortality rates. If you’ve noticed an escalating number of naval problems, thoroughly analyze your incubation techniques and the cleanliness of your incubator to pinpoint potential problems in your incubation program that could put your future chicks at risk. 

12 Ideal Incubation Tips

Even chicks hatched from eggs incubated under the best conditions may still have poor navels. But it’s less likely. Poorly healed navels can be a definite sign that conditions in your incubation program aren’t ideal. 

Try these 12 tips to improve your program to promote better navel quality and healthier chicks.

1. Use only fresh, fertile eggs laid at approximately the same time by breeder birds younger than 50 weeks old.

2. Select eggs that are normal in color, size, shape and shell texture.

3. Ensure the incubator is placed in an area free from drafts, that’s not too close to heaters or heating ducts or in direct sunlight.

4. Always thoroughly clean your incubator between every hatch and ensure it’s appropriately calibrated for temperature and humidity control before setting any eggs.

5. Operate your incubator for several hours before placing eggs inside to ensure temperature and humidity are stabilized.

6. Maximize yolk sac utilization by avoiding temperatures that are too low or too high in the setter, where eggs are turned every hour for the first 18 days of incubation.

7. Optimize hatcher ventilation regarding relative humidity and carbon dioxide.

8. Avoid high temperatures in the hatcher, which can make the navel close too fast before full absorption of the yolk sac.

9. Adjust the rate of weight loss during incubation if you notice poorly closed navels combined with full bellies.

10. Shoot for a narrow hatching window by promoting appropriate preheating and uniform incubation conditions.

11. Avoid exposing hatching eggs to fluctuating temperatures or rapid temperature changes.

12. Immediately remove any moldy, cracked or leaking eggs to prevent losing your entire hatch.

This article about do chickens have belly buttons originally appeared in Chickens magazine. Click here to subscribe.

Categories
Urban Farming

Garden Ideas: Use the Farmers Market As A Guide

Garden ideas can be like weeds; they keep popping up! Try these tips using the farmers market as a guide to help focus your attention as you plan your garden.

What is cheap and easy to find at the farmers market?

Zucchini, canning tomatoes, slicing cucumbers, peppers, radishes, the ubiquitous yellow summer squash and even melons are all a dime a dozen in peak season. Make friends with your farmer and show up at the end of the market—you’ll probably get a deal. Ask your farmer if they have “seconds,” which are lower quality but perfectly good for eating and preserving in bulk. You may want to skip past growing these vegetables or only plant a small amount since they will likely be abundant throughout the season.

What is more economical for you to grow yourself?

Think long-term growing versus short-term growing garden ideas. Broccoli, cauliflower, celery and leeks will take a very long time to grow and will use up space in your small garden for little harvest yield. On the other hand, fresh herbs, lettuce or other micro-greens, peas, and cherry tomatoes all do well in small-scale gardens. They produce several harvests per crop and you can harvest the amount you want whenever you need. Zucchini flowers are another pricey purchase that you can grow yourself and are best when harvested fresh.

What can’t you find at market?

A gardener’s secret treat is a freshly picked okra pod eaten raw. It’s delicious, and best when the pod is much smaller than the typical size sold at the farmers market. Try planting a few stalks for this special (and very gut-healthy) treat. Ground cherries, stinging nettle and tulsi basil are on my personal list of hard-to-find items to grow.

What is beneficial for your garden?

While the farmers market is for groceries, your garden isn’t just about growing food. You may want to grow plants that attract beneficial insects and encourage biodiversity and beauty in your garden, such as alyssum, fennel, hairy vetch and others.

So be strategic in the coming growing season. You might not have a lot of land to grow on and lots of garden ideas, but you can surely maximize what you have while accentuating your diet at the same time.

This article about garden ideas from the farmers market was written for Hobby Farms magazine. Click here to subscribe.

Categories
Farm & Garden

Understand Your Hardiness Zone Map & Microclimates

The USDA plant hardiness zone map is something that any gardener or horticulturist with meaningful experience shopping for plants is familiar with. (If not, check out the online version here.) Like an imposing arbiter of vegetation dispersal, the color-coded map breaks the U.S. and Puerto Rico into 13 zones based on the average annual extreme minimum temperature—in other words, the lowest temperature each zone experiences in a typical year.

Each zone is further divided into two half-zones, labeled “a” (colder) and “b” (warmer). These zones are used to label the hardiness of plants, determining whether they’re suited for planting in any given region. A variety of raspberry bush, for example, might be rated for success in zones 5 through 9.

Some zones are too warm for certain plants. Apple trees, for example, need a certain number of “chill hours” (below 45 degrees F) during the winter in order to grow properly and produce fruit. But for much of the U.S., cold temperatures are arguably the greater limiting factor than heat. Cold temperatures can quickly damage and kill plants that aren’t suitably cold-tolerant.

But before you assume you can never grow a plant that isn’t rated for survival in your hardiness zone, keep in mind the zone delineations aren’t perfect. The hardiness zone map borders can change over time  and no nationwide map can capture every local temperature nuance.

The Magic of Microclimates

The last point is worth reiterating because it’s good news for those of you with ambitious green thumbs. Just because a general region fits within one hardiness zone map doesn’t mean every acre of land within the region occupies that zone. A “microclimate” is exactly what its name suggests: a small area with a different climate than nearby or surrounding areas.

Let’s explore a large-scale example. Large swaths of the state of Wisconsin are labeled either hardines zone map 4a or zone 4b, with average annual extreme minimum temperatures ranging from -20 to -30 degrees F. But in the southwest portion of Wisconsin, there are many regions labeled zone 5a surrounded by zone 4b territory. Small variations in regional climate can make the boundaries between zones quite messy. Certainly, they’re not linear bands, even though a birds-eye view of the entire U.S. might give this impression.

But microclimates can be smaller—too small to show up on a map. The north side of a hill can be meaningfully different than the south side. Multiple microclimates can exist across a single property, and the key to growing plants outside of your hardiness zone is recognizing and capitalizing on these subtle microclimates.

Your Hardines Zone Map Microclimates

Picture the scene: You live in zone 4b, you’re perusing seed and garden catalogs, and you’re lamenting the number of lovely plants that claim zone 5 as their cold-weather cutoff. That flowering shrub would be beautiful! That apple variety sounds so tasty. And you dare not imagine the taste of those blackberries!

But take heart, just because you live in zone 4b doesn’t mean the entirety of your property diligently obeys the USDA plant hardiness zone map boundaries. The average annual minimum winter temperature for your area might be 20 to 25 degrees below zero. But there could be areas of your property where the temperature never dips below minus 20 degrees, falling squarely in the zone 5a range.

Warmer-than-average microclimates may exist in the following locations:

On Hills & Slopes

Warm air rises, and cold air sinks. The same fact that powers hot-air balloons means the tops of hills and slopes can stay warmer than valleys and low ground in between. Cold air settles in low spots because it can’t sink any further, so if you’re looking for a warmer microclimate, head for the hills.

Near Buildings

While you don’t want to grow plants right up against a building (this is especially true for large trees and shrubs), each side of a house, barn, shed, etc. can produce a different microclimate. For example, prevailing winds in North America tend to blow from the west and northwest, so planting to the east and southeast allows buildings to act as windbreaks, sheltering plants from cold winter winds. (They may receive less rain, too, so bear that in mind when watering.)

South-Facing Slopes

In the Northern Hemisphere, the sun is found in the southern sky. This means south-facing slopes receive more direct sunlight than north-facing slopes and tend to stay warmer. However, keep in mind some fruiting trees may benefit from the milder temperature swings found on north-facing slopes, helping protect them from sun scald (cracking of the bark caused by extreme temperature shifts) and also from exiting dormancy too early in the spring.

Urban Heat Islands

Cities are warmer than the countryside. Buildings, concrete, pavement, etc. absorb the heat of the sun and prevent temperatures from dropping as much as in surrounding areas. The heat islands generated by some large cities are labeled in the USDA Plant Hardiness Zone Map. Chicago, for example, is marked as zone 6a even though the surrounding areas are zone 5b.

If you live in a smaller city, consider the possibility that your local heat island isn’t marked. Your local winter temperatures might actually stay half a zone warmer than the map indicates.


Read more: You can use these 4 items as emergency cloches.


Enhance Your Microclimates

Choosing a naturally favorable microclimate is half the battle and might be all you need to successfully grow a warm-weather plant in a colder zone. But you can also take steps to maximize the benefits of a microclimate and further ensure that your plants escape the harshest winter weather.

The exact steps you take will vary depending on the zone in which you live. For example, mulching plants is an excellent way to lock in soil warmth and protect sensitive roots.

In a relatively warm zone such as 9a (where the average annual extreme minimum temperature ranges from 20 to 25 degrees), mulching might involve covering the ground around a plant with a protective layer of leaves, pine needles, straw, wood chips, shredded bark etc. For trees, mulch should extend as wide as the canopy overhead. So long as you make the layer deep enough (2 to 6 inches, depending on the material) and avoid piling the mulch within an inch or two of plant stems, you’ll be good to go.

But the situation may be different in colder zones. In areas that receive significant snowfall, the snow itself can serve as a surprisingly effective “mulch” for overwintering plants. Where I live in zone 4a, the coldest temperatures tend to occur in January, when there’s a thick blanket of snow across the ground. A foot of snow can insulate the ground quite nicely and help protect plant roots from those frigid 25- to 30-degree-below-zero temperatures.

Of course, not every area of the country consistently receives that volume of snow (or those subzero temperatures), and there are other steps you can take to protect plants from moderate cold weather. If a plant is small enough, you can cover it during nighttime cold snaps with a cloche, a transparent cover (often bell-shaped) made of glass or plastic that essentially serves as a miniature greenhouse. Less formal coverings can also be employed—buckets, garbage cans, boxes, planting pots, etc.

microclimates
Daniel Johnson

For larger plants, try covering them with sheets of cloth or plastic. Use stakes or even wooden scaffolding to construct a protective framework around the plants, making sure you don’t allow plastic to touch the foliage. Make sure the covering stretches all the way to the ground (and is pinned to the ground with stakes, rocks, etc.) or warmth will escape from under the covering. The idea is to build a tent or canopy to catch heat radiating up from the ground, so cinching a cover around the base of a plant isn’t ideal.

microclimates
Daniel Johnson

If you have a large garden (or simply wish to take a less cobbled-together DIY approach), row covers provide similar benefits for beating frost and mitigating the effects of cold weather. The materials are specifically designed to cover plants (either by draping over them or by riding on top of a support frame) and allow water and varying amounts of sunlight to pass through. This means they can be left in place for long periods of time while plants grow happily underneath, protected not only from cold but also wind and pests.

Watering plants before a cold snap is beneficial, too. Moist soil loses heat more slowly than dry soil, helping protect roots. And plants that are in prime condition (i.e., not struggling from lack of water) are more likely to survive cold temperatures than those already dealing with stress.

Windbreaks can also make a difference. Planting rows of windbreak trees is a big commitment that may require years to reap full benefit. But windbreaks on the west and north sides of garden and orchard plantings can block bitter winter winds and provide shelter for cold-sensitive plants.

On a smaller scale, buildings, rock walls and similar obstacles can protect plants so long as they block the prevailing wind.


Read more: Check out these tips for using trees as a farm windbreak.


Plants in Pots

Finding and enhancing microclimates not featured on the USDA hardiness zone map can only go so far in extending the number of cold-sensitive plants you can grow. There’s nothing I can do in zone 4a to grow a lemon tree that thrives in zones 10 and 11.

Or is there? If you’re willing to grow potted plants and move them indoors when cold weather strikes, a whole world of possibilities opens up. And yes, it’s even possible to grow citrus fruit.

Growing potted plants is a skill unto itself, especially if you’re raising dwarf trees in pots. Here are some tips and pitfalls to keep in mind.

  • Potted plants are more susceptible to cold temperatures than plants in the ground because their small pots can’t hold as much heat as the earth. When cold temperatures are in the forecast, you have to be extra careful about bringing potted plants indoors to protect their roots.
  • Some plants, particularly trees, will readily outgrow their pots. As they grow, you have a couple of options. You can replant in a larger pot, providing more room for growing. Or you can trim back the roots and branches, reinvigorating the plant while keeping it in the same pot.
  • When it’s time to bring plants indoors for the winter, don’t make the transition too abrupt. You’ll risk shocking the plants. Instead, prepare before cold weather hits, placing your plants in a shady spot for at least a few days (maybe even a week or two) before bringing them indoors. The same strategy should be employed in reverse when bringing potted plants back outdoors in the spring.
  • Once indoors, place your sun-loving plants in southern windows so they can receive direct sunlight. If you live in a region with short winter days, you may want to invest in some full-spectrum grow lights to compensate and help your plants thrive.

Hoop Houses, Greenhouses, Cold Frames & Hot Boxes

If you want to dive headfirst into creating favorable microclimates from scratch, consider building a hoop house or greenhouse.

  • A hoop house is the simpler option. It’s made of plastic installed over an arched framework and captures sunlight to warm its interior.
  • A greenhouse is similar but more sophisticated. It’s an actual building constructed with the walls and roof transparent to allow sunlight penetration.

Full-fledged greenhouses armed with heating, cooling, ventilation, grow lights and other features are expensive to build but offer amazing possibilities for growing plants outside their natural hardiness zones. Hoop houses can be built at a lower price point but are arguably more effective at extending the growing season in the spring and fall than providing full winter protection, especially if sunlight is your only source of heating. Care must be taken to ensure your hoop house is sturdy enough (and warm enough) to handle winter weather if overwintering plants is your goal.

small greenhouse box being built can be used to extend growing beyond the hardiness zone map
Daniel Johnson

Gardeners growing small plants can also consider cold frames and hot boxes, which are boxy enclosures with transparent tops and—in some cases—transparent sides, making them resemble miniature greenhouses. A cold frame operates by the same principle as a hoop house, capturing sunlight to create a warmer microclimate for plants growing inside. A hot box features another heat source aside from the sun. The heat source can be electric, or you can prepare a layer of fermenting horse manure underneath the gardening soil.

Cold frames and hot boxes are commonly used to extend the growing season in spring and autumn, but they’re also effective for hardening off plants transitioning from warm conditions (such as those found in a greenhouse) to life outdoors. In some climates, and with certain plants, cold frames and hot boxes can even provide suitable protection throughout the winter.

Risks & Rewards

Even when you put everything in your favor, growing plants outside of their preferred hardiness zones can be a risky business. Hardiness zones are based on the average annual extreme minimum temperature. A colder-than-average year may come along and damage or kill cold-sensitive plants despite your best efforts.

If you live in zone 4, I can’t recommend landscaping your entire property with plants rated to grow in zone 5 and warmer.

But if your property offers a favorable microclimate and you want to try growing a few warmer-weather plants, by all means, give it a go. A little thought and effort when it comes to planting location and winter preparation can expand your horizons beyond the hardiness zone map and guide you on a fun new adventure. Good luck! 

This article about the USDA Hardiness Zone Map originally appeared in the March/April 2023 issue of Hobby Farms magazine. Click here to subscribe.

Categories
Poultry

7 Chicken Coop Bedding Material Options

Chicken coop bedding isn’t just a luxury. Sufficient litter provides a secure foundation for chickens’ legs and feet, a soft landing for eggs, a way to gather droppings quickly and the ability to easily clean your birds’ housing. Here are a few of the more widely used bedding materials—plus a few nontraditional ones—and how best to use them.

7 Chicken Bedding Options

Traditional chicken coop bedding materials and nontraditional ones have their pros and cons, but your options are manageable.

1. Straw and Hay

Sun-colored straw, with its sweet, earthy smell and springy texture is what many new chicken keepers reach for to line their coop and nest boxes.

2. Pine Shavings

A popular and prudent choice for litter is pine shavings, found at many feed-supply stores, big-box stores and even pet-supply stores. Pine shavings dry fast, are inexpensive and don’t break down quickly, making them an ideal bedding material. The mild pine scent is inviting, though it does fade over time.


Also Read: How To Use Sand As Coop Bedding?


3. Cedar Shavings

Speaking of a pleasant aroma (and that’s a rare topic indeed where chickens are concerned!), an alternative to pine shavings is cedar shavings. There’s much debate as to the strong aromatic nature of cedar shavings and their effects on chickens’ delicate respiratory systems, and it seems the jury is still out. To play it safe, I recommend avoiding the use of cedar shavings with very young chicks confined to a brooder.

However, many chicken keepers have used cedar shavings with success in their coops with adult flocks, so long as the birds have other areas to inhabit besides the coop. If you opt for cedar shavings, they’re easy to find at pet-supply stores but are a little more expensive than pine; they do really smell great and work as a natural insect-repellent.

4. Sand

Sand, when used as coop bedding, is an excellent and very clean choice for those who have the time to devote to it. While expensive initially, compared to the alternatives listed here, sand as bedding in the coop need only be replaced once or twice a year if diligently cleaned and contained.

Sand dries very quickly and can be turned over with a rake to employ the deep-litter method (discussed below) or scooped with a cat litter scooper when used in small coops. Sand is the flooring material of choice for outdoor runs that are exposed to the elements frequently: It doesn’t break down, it dries fast and it doubles as a great material for dust baths. Your chickens will love it, as mine do. Be sure to use builder’s sand (found at home-improvement stores), as sandbox sand is too fine and tends to clump.

5. Grass Clippings

If you have enough, grass clippings are one viable coop bedding option, but they have a few disadvantages. Clippings tend to retain moisture and break down quickly. They also dry, shrink and smell. If you opt for grass clippings in the coop, be sure they come from a yard that hasn’t been sprayed with pesticides, fungicides, herbicides or other chemicals. Chickens will pick at anything and everything in their coop–bedding is no exception, especially if there are bugs in it!

6. Shredded Leaves

This is an option if the leaves are finely shredded so they dry quickly. Whole leaves take a long time to break down and are susceptible to harboring moisture, sticking together and matting. Wet leaves make a slippery surface that could lead to splayed legs or bumblefoot, especially in younger, growing birds.

7. Recycled Paper

A host of reclaimed and recycled manmade materials, such as shredded newspaper or shredded office paper, are options. While they are free, use them with caution. Ink can be toxic to chickens, and office paper is heavily processed and treated. Glossy paper—the kind found in magazines and fliers—also contains a large amount of ink and can create a matted and/or slippery surface.

What Are the Best Bedding Options to Use?

In my opinion, pine or cedar shavings are the best bedding materials for nest boxes. They dry quickly, offer substantial padding for eggs, and smell fresh and woodsy. If you’re wary of using cedar shavings in the coop, the nest box is a great place to try it out. Chickens are rarely in a nest box long enough for any aromatic oils to disturb their respiratory systems (unless brooding, of course).


Also Read: Choose The Right Bedding For Your Coop and Run


Mix in some crushed, dried herbs, such as mint, rosemary or lavender to keep certain pests at bay. This is a common practice to naturally fight pests, and most chickens don’t suffer any adverse effects from aromatic oils of the herbs.

For the Coop

For the chicken coop, it seems pine and cedar shavings would win again. (Again, this is my article and my opinion!) For all the reasons mentioned previously, shavings are the ideal material to line the coop. Using the deep-litter method ensures that even the bedding doesn’t go to waste and doesn’t require a significant investment in litter to have a healthy option for your flock.

For the Run

For an outdoor run, sand is the winner. Again, it dries fast, doesn’t break down, can be easily turned over to use the deep-litter method, and your flock will love to dust-bathe in it. I’ve never replaced the sand in my run; I’ve only added to it, as the dust-bathing chickens toss it out!

What is the Deep Litter Method?

The deep-litter method of coop cleaning involves a little preparation, timely attendance and some calculated laziness. The idea behind the deep-litter method is simple: Begin with several inches of bedding material, and build the bedding, lasagna-style. Add a few more inches of material about once per month, give or take, depending on the size of your coop, the number of birds you keep and how much time they spend in their coop.


Also Read: Bedding: 11 Options for Your Chicken Coop & Run


Include a bit of food-grade diatomaceous earth with each layer. Keep a rake handy to turn the bedding over periodically—generally, about once a week. If you begin to see flies, pests or an excess of manure, add more bedding and turn it more often.

The deep-litter method requires no more bedding material than any other method, but it does accumulate over time and tends to trickle out as the birds come and go. Use a plywood board or something similar at the coop door to contain the bedding.

The idea behind the deep-litter method is to allow the older bedding and chicken waste to break down, slowly decomposing (and essentially composting) in the coop while providing a bit of natural warmth. It’s also a fabulous method designed to save the chicken keeper’s time, energy and back. The deep-litter method of coop maintenance requires a full coop cleaning about once a year, and even that may be more frequent than is needed. Use your eyes, nose and good judgment to determine when you need to replace the bedding and start again. A clean, cared-for coop should never emit odor.

How to Save Money by Using a Dropping Board

Chickens make the majority of their waste during the night when roosting, so the best way to be frugal about the bedding you purchase and use in your coops is to install and employ a dropping board or tray placed under the roosts. The boards will catch all the nighttime waste, sparing your bedding of large amounts of waste trafficked across the coop and will remain dry and (mostly) clean.

Dropping boards also make transfer of pure waste to composts easy and efficient. A board can effectively be used in addition to the deep-litter method, and with both methods combined, might save additional costs in bedding than if you were simply employing one.

Unless your birds are kept in wire-bottom hutches (something I don’t recommend), all coops need bedding. Remember, lining the coop with comfortable, quality litter isn’t spoiling your birds; by providing them a soft foundation and keeping it clean, you are ensuring the health of your flock, their comfort and clean eggs. Your birds (and their uncracked eggs) will thank you!

This article about chicken coop bedding was written for Chickens magazine. Click here to subscribe.

Categories
Crops & Gardening

Ollas: Reduce Watering with These Garden Vessels

Ollas are garden waterers that provide a sub-soil, slow-release irrigation solution that’s easy and cheap to install and can save both time and water.

In the thick of warm and dry spells, it can be challenging to not only keep the garden watered but to keep it watered deeply enough to encourage adequate root penetration. This is especially true for gardeners growing irrigation-dependent non-native plants, which is most of us. Often, surface watering on dry soil will evaporate before ever penetrating the lower soil layers.

There are a number of things that can help keep plants sufficiently hydrated during especially arid warm spells. Mulch, for example, can help keep the soil cooler, as well as hold in soil moisture. Beyond a simple top-dressing of organic matter, ollas, which are buried unglazed and covered clay vessels filled with water can be a perfect solution.

Operating on a simple principle of osmosis, unglazed clay vessels will slowly diffuse water into the surrounding unsaturated soil. Whether these vessels be simple flower pots, traditional ollas, or even the terra-cotta plant nanny doesn’t matter too much. What counts is that they deliver a constant supply of water to the root zone, thus reducing surface evaporation and the likelihood of acute water stress for the plants nearby. Larger buried olla vessels may only need to be filled once a week, for example, which means that the plants surrounding the olla are taken care of for the entire time there is water in the reservoir.

Mary Kathryn Dunston, owner of Dripping Springs Ollas, says that ollas can save up to 70 percent in water use, compared to watering aboveground. Also, because ollas water below ground level, the weed seeds aren’t watered, and the root base of the plants around the olla grows larger, producing a healthier plant.

“The garden olla is an ancient clay pot irrigation system that has proven itself worthy for thousands of years,” she says. For gardeners in colder climates, some ollas are strong enough to be left in the ground year-round,” she says. “If you have too much rain, the water will go back into a near empty olla after a deluge and decrease up to 80 percent the splitting of succulent foods, such as melons and tomatoes.”

A 2.9-gallon olla can water out up to a 4-foot circle, depending on soil, mulch and how many plants are around the olla.

“Ollas save time—as they need filling one or two times a week—they save money on water, and there is less worry. Even in the driest months, you know your plants are getting adequate water,” she says.

Installing underground clay vessel irrigation couldn’t be simpler. Dig an area about two or three times as large as the vessel and completely cover the edges and sides soil. Be sure not to bury it too deep, though—the vessels require an opening available above the soil where you can fill them with water.

After burying, plant your most water-demanding crops around the vessel, and they will benefit from having a cool and constant supply of below-ground moisture.

This article about watering with garden ollas was written for Hobby Farms magazine. Click here to subscribe.