


Small farms don’t have to be restrictive when you’re thinking of raising livestock including cattle, sheep, goats, pigs, chickens and turkeys, and dogs to guard or herd them. Livestock need room to roam—and root, forage, peck or scratch—but certain breeds, including miniature versions of standard breeds, can thrive on small farms.
1. Pygmy Goat
As its name suggests, this goat breed is petite, with a height of just 16 to 23 inches and weighing in at 60 to 80 pounds (about the size of a large dog). Their animated nature makes Pygmy goats (pictured above) popular pets, but the breed also has a place on the farm. Females produce excellent milk that can be used in cheese-making.
The does are strong breeders. Their first breeding typically occurs between 12 and 18 months, and after a five-month gestation period, does can bear one to four kids every year. Kids are fully weaned around 3 months of age.
Like other breeds, Pygmy goats are social and do best in a herd atmosphere. Pygmy goats are also active and need ample space for exercise.
2. Berkshire Pig
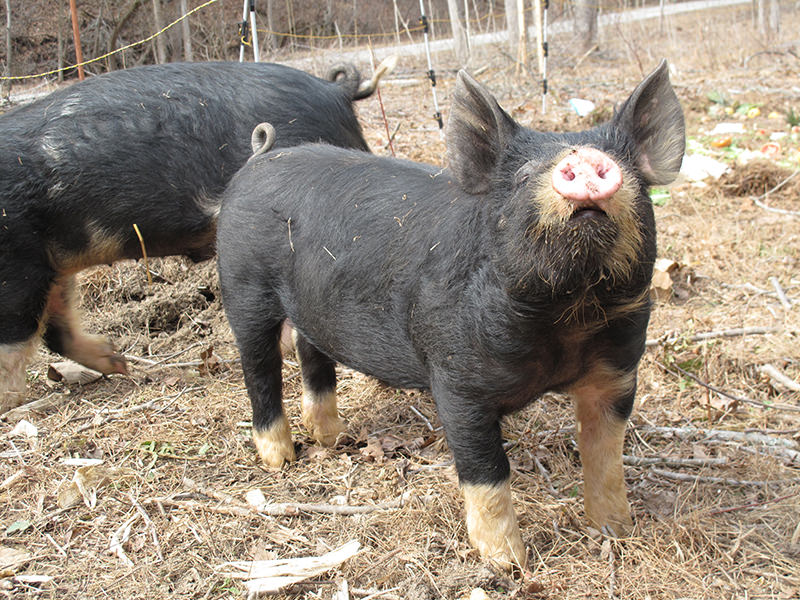
The Berkshire can be traced back to England in the 1800s. When the American Berkshire Association was formed in 1875, it was the first swine registry and breeding group in the world. The breed is prized for its meat: With a market weight of 600 pounds, Berkshires produce juicy, flavorful meat that marbles well.
On small farms, Berkshires thrive. It’s a hardy breed, and the pigs are excellent foragers with calm dispositions. The sows produce an abundance of milk so their piglets grow quickly. Their dark coloring—black with white legs, faces and tails—protects against sunburn, making them suitable for the outdoors.
3. Miniature Cattle
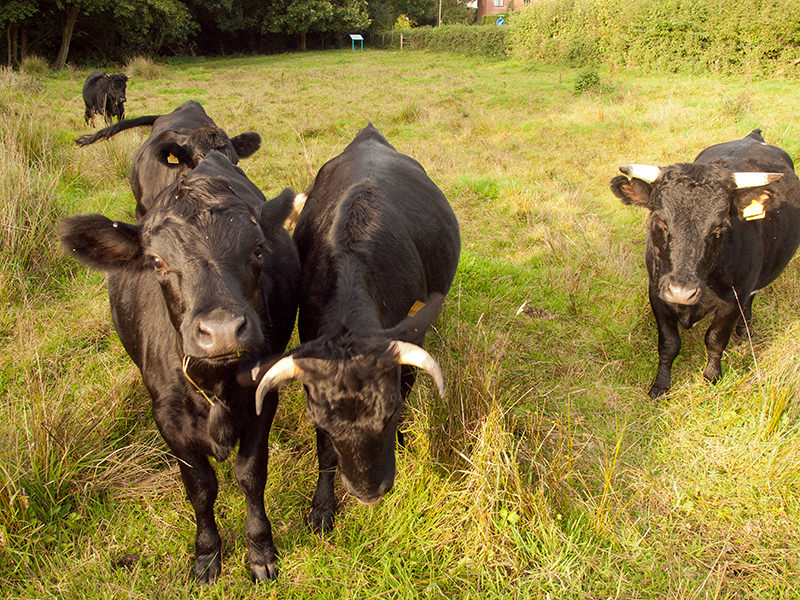
A herd of large Holsteins might not be right for small farms, but that doesn’t mean cattle are out of the question. Several miniature cattle breeds, such as Dexters, Miniature Jerseys, Miniature Herefords and Lowlines, make up this small-farm option.
The docile, dual-purpose Dexter (producing milk and meat) is among the smallest breeds; an adult bull measures 38 to 44 inches at the shoulder and weighs less than 1,000 pounds. Jerseys, Miniature Herefords and Lowlines, aka Miniature Angus, are smaller versions of their standard-sized counterparts. While the diminutive Jerseys are prized for rich, creamy milk, Herefords and Lowlines produce tender, high-quality beef.
4. Babydoll Southdown Sheep
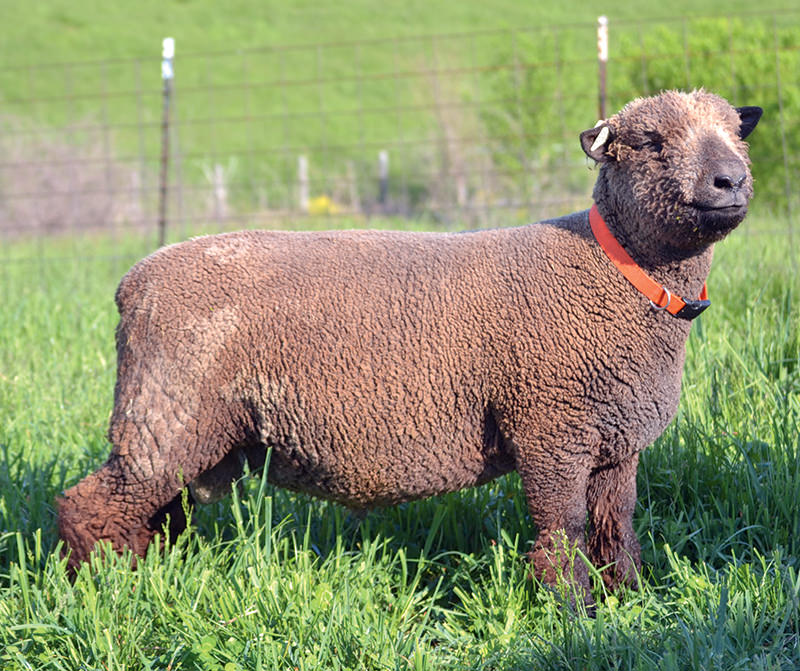
The North American Babydoll Southdown Sheep Association refers to the diminutive breed as “impish creatures” because of their dispositions and adorable appearance. The hornless breed originated in England in the 1800s. The ewes, known as excellent mothers that often produce multiples, reach a height of 20 to 23 inches; the rams top out at 24 inches.
Babydoll Southdowns have sought-after fuzzy white, off-white (light tan or gray) or black fleece that can be spun into luxurious fiber. Thanks to its small size and friendly disposition, the breed is often raised as a pet or used in 4-H projects. Babydoll Southdowns are also excellent foragers and are employed to keep grass trimmed and weeds down.
5. Jacob Sheep
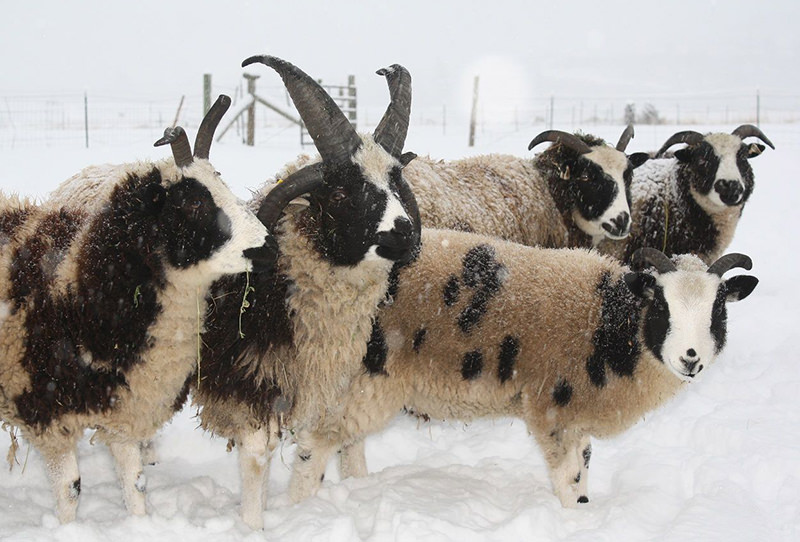
These black-and-white spotted sheep were popularized in England in the 1600s and imported to North America three centuries later. Ewes weigh between 80 and 120 pounds, and rams seldom weigh more than 180 pounds. Depending on breeding, some Jacob sheep (both ewes and rams) have two, four or six horns.
Their docile nature makes Jacob sheep ideal for novice farmers. Fiber artists are also big fans of the wool, as the breed produces a medium fleece with unique color combinations of black, white or a blend of both.
It’s difficult to find purebred Jacob sheep because they’re often crossed with other breeds, such as Dorsets, and the spotted offspring are marketed as Jacob sheep.
6. Miniature Cheviot Sheep
A smaller version of the American Cheviot, this sheep measures to just 23 inches; mature ewes weigh between 45 and 85 pounds while rams top out at 100 pounds.
The breed originated in the Cheviot Hills on the border between England and Scotland and is hailed as one of the U.K.’s hardiest breeds, thanks to its ability to thrive in the bleak, windswept landscape. Miniature Cheviots are mild-mannered, active sheep that love to forage and make great mothers, often producing twins.
With its distinctive white, wool-free head, black muzzle and long wool, the Miniature Cheviot is raised for its fleece, which can be white, black, tan or painted (a combination of two or more colors in the fleece).
7. Tamworth Pig
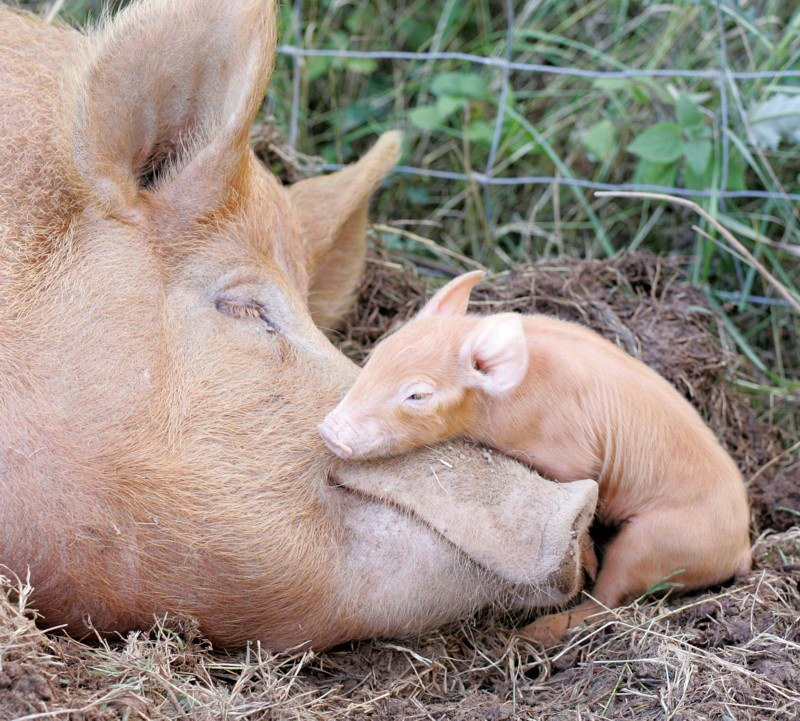
Named for the village of Tamworth in England, where the breed originated, these dark-red pigs with long snouts are excellent rugged foragers. Tamworth hogs are active and need space to root and wallow. Their red coloring allows them to adapt to various climates because it protects against sunburn.
Once considered a “bacon breed” because of their slow growth and lean, fine-grained meat, Tamworth pigs, which reach a mature weight of between 500 and 600 pounds, are raised for all cuts of meat. The sows are prized for their ability to raise large litters, making excellent mothers and doing a good job of suckling their litters.
8. Nigerian Dwarf Goat

The breed originated in West Africa and resembles a petite version of large dairy goat breeds. Nigerian Dwarf goats range from 17 to 20 inches in height and weigh about 75 pounds. Both does and bucks have soft coats with short to medium hair in a number of color combinations, including black, chocolate, Dalmatian (black-and-white spotted), and gold and white.
This gentle breed is often kept as a pet or used in 4-H projects. On small farms, Nigerian Dwarf goats are great milking goats, producing a surprising amount of milk for their size; the milk is higher in butterfat than other dairy-goat breeds.
9. Large Black Pig
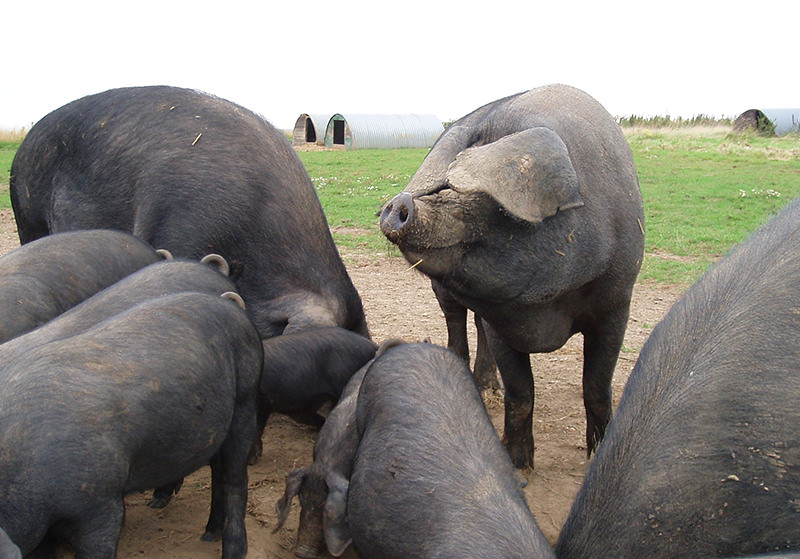
As its name suggests, the breed is named for its size and coloring. Perhaps the most noticeable characteristics of the Large Black are its lopped ears that flop forward, giving them the appearance of blinders.
Although it was one of the most popular breeds in the U.K. in the 1900s, The Livestock Conservancy now considers the Large Black a threatened breed. Large Blacks are excellent rooters and foragers; in fact, the shift to industrial/indoor production was one of the reasons the breed fell out of favor. For pastured pork, the breed, which reaches adult weights ranging from 650 pounds to 750 pounds, produces high-quality, lean meat.
10. Welsummer Chicken

These petite chickens just weigh less than 6 pounds. Although the hens are vigorous layers, producing deep-reddish-brown and sometimes speckled eggs, the Welsummer breed is a dual-purpose bird that can also be raised for meat.
The breed originated in Holland and has a docile temperament. Welsummers are adaptable to most climates and fare well in cold and heat. They prefer to free-range and needs ample space to scratch and peck for their supper. Hens might go broody.
The medium-brown feathers of the Welsummer are tipped in dark brown and reddish brown with gold tips around the neck.
11. Bourbon Red Turkey

An American breed, the Bourbon Red is a cross between the Bronze, Buff and White Holland breeds and named for Bourbon County, Ky., where it was first developed. The birds have brown to dark-red plumage with white flight and tail features; toms might have feathers edged in black.
Active foragers, Bourbon Reds do well on pasture, making them perfect for small-flock production. They reach a market weight between 14 and 23 pounds, producing heavy breasts and richly flavored meats. The hens lay pale eggs with light brown spots.
Although most Bourbon Reds are good-natured, some breeders select for aggressive traits, so toms will be more driven to mate. Careful breed selection is essential.
12. Orpington Chicken
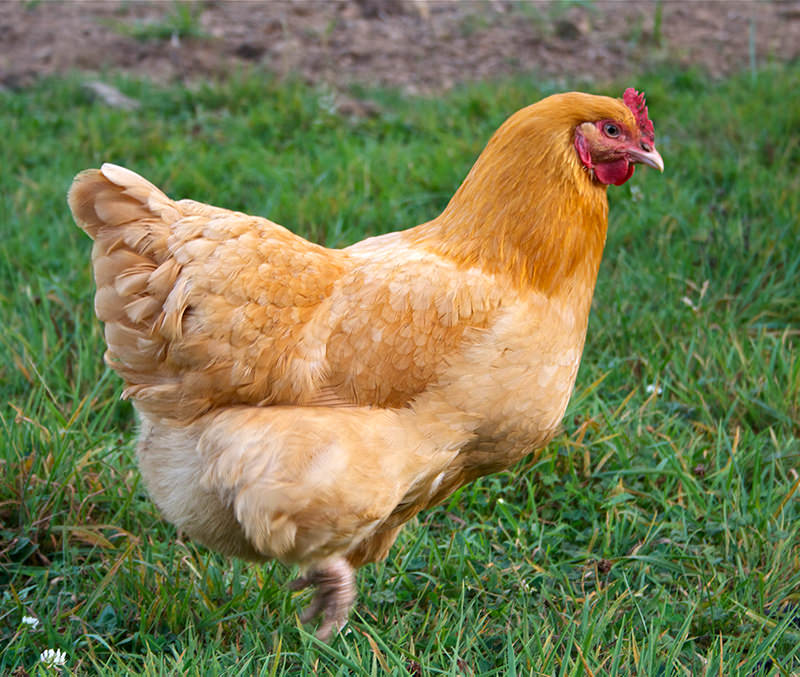
Raised for eggs and meat, these docile dual-purpose chickens, developed by William Cook in Orpington, England, in the late 1800s, are still popular today for their rapid growth, weighing between 7 and 8½ pounds at 5 months, and their prolific egg-laying, producing large, light to dark-brown eggs.
The Orpington is popular with small farms and backyard chicken keepers because it’s calm and friendly, making it an ideal egg-laying pet. There are several varieties, including Black, White, Buff and Jubilee, a speckled bird.
13. Narragansett Turkey

Another American breed, the Narragansett was named for Narragansett Bay in Rhode Island, where it was developed from a cross between domestic and wild turkeys. Its color pattern is a striking combination of black, gray and white with a red to bluish-white head.
Although the breed is known for its meat (the birds reach a market weight of 14 to 23 pounds), Narragansett turkeys are also regarded for superior egg production, laying pale brown-spotted eggs. On pasture, the turkeys are excellent foragers with strong maternal instincts.
14. Guardian Dogs for Small Farms

Livestock guardian dogs, or LGDs, can play an important role on the farm. The most common LGD breeds include Great Pyrenees, Anatolian Shepherds, Akbash, Kangal and Maremmas. Great Pyrenees are known as gentle giants for their ability to show affection to their families while guarding flocks ranging from chickens to alpacas. In contrast, Anatolian Shepherds have strong protective instincts and incredible endurance and are best-suited to farms with experienced owners. Both Maremma sheepdogs and Akbash look similar to Great Pyrenees thanks to their thick white fur and dark eyes. The Kangal, like the Akbash and Anatolian Shepherd, originated in Turkey. It can be territorial and protective of its flock and its family.
15. Herding Dogs for Small Farms

Nonguardian dogs have an equally important role on a small farm: using their herding instincts to keep livestock in line. Border Collies (pictured) are hailed as the best sheepherding breed in the world, using stalking movements and an intense gaze to guide sheep in a desired direction. Border Collies are comfortable working long hours on rugged terrain but are also affectionate and make great companion dogs. Australian Cattle Dogs, as their name implies, were bred to herd cattle in the outback of Australia. It’s believed that crossing the dingo, Kelpie, Dalmatian and Highland Collie created the breed. The result is a working dog with the strength and stamina to control cattle across large rangelands. Herding dogs have a strong work ethic and make excellent four-legged farmhands. The breeds can also form strong bonds with their owners and are suitable as pets.
This story about livestock breeds for small farms originally appeared in the July/August 2016 issue of Hobby Farms. Click here to subscribe.


 Another key to her relationship with photographers is being respectful and timely with communication. Her goal is to always answer within an hour of receiving messages. She communicates with clients and photographers. Being timely to photographers is especially important because as the third party in the conversation, dates and details need to be set for others. “I’m careful not to guarantee anything being in bloom. We say there will be something blooming all of June-September,” says Lacie. Working with nature, she has learned anything can happen.


